How to Make a Felted Landscape Scene

Make a beautiful scene with animal fibers like wool and mohair to frame and admire. This tutorial will walk you through the steps to create a wet-felted landscape. Instructions for adding needle-felted details to your picture are also included.
This post contains affiliate links. As an Amazon Associate, I earn from qualifying purchases.
Wet felting has become my new passion. Since buying Angora goats, I have been having so much fun finding creative uses for my own mohair and the wool that I get from my spinning mentor.
Felted soap, hot pads, bowls, coasters, dryer balls, pin cushions, and even rugs are among my latest creations. Use the links provided to learn more about making those projects.
I find arranging fiber and working with it with my hands to be therapeutic. Somehow, it is relaxing and energizing at the same time.
Here is the process that I use to make felted landscape pictures. Follow along and create your own masterpiece to frame and admire!
Fiber Selection for a Felted Landscape Scene
Choose a natural animal fiber to make a felted landscape scene, synthetics will not felt. I use coarse wool that felts easily to make the backing for my picture; my favorite is Romney.
Wool or mohair roving, combed top, or a batt of fiber can be used to make the wet-felted landscape and needle-felted embellishments. I use a combination of dyed Teeswater/ BFL wool and natural colored mohair in my designs.
Your fiber should be already washed or scoured and processed so that it is ready to use. Having a wide range of colors is helpful to get depth and accomplish the look you want. If your color palette is limited, don’t worry! You can blend what you have to make new shades.
Felting Techniques Used to Make a Felted Landscape Scene
Hand manipulation and rolling are the techniques I employ to create a wet-felted landscape picture. Water, soap, and agitation are all that it takes to get the fibers to bind to one another.
Wet felting is not hard, but it is time consuming. Taking the time to layer your backing and background fibers and working slowly and methodically is essential to end up with a symmetrical piece that isn’t distorted.
By wet-felting, you will transform a fluffy mass of fiber into a felt fabric that you can later add needle-felted embellishments to. If you prefer a more mottled look, you can stop after wet felting. You will still have a beautiful scene.
Needle felting is an additional step that you can complete after the picture dries. Needle felting involves stabbing additional fiber onto your background to make more detailed designs.
Equipment Needed to Make a Felted Landscape Scene
- Coarse wool for the backing
- Dyed wool or mohair for the wet and needle-felted design
- Bubble wrap
- Felting mesh
- Water
- Soap
- Bulb sprinkler
- Dowel
- Bath towel
- Felting needles
- Finger guards
- Felting mat
The amount of fiber that you need depends on how big a picture you would like to make. It is important to remember that when wet felting, your piece will shrink by about 30 percent.
You will need two pieces of bubble wrap for the project. They just need to be as big or bigger than your picture. Felting mesh is helpful for the initial stages when your fibers are prone to move, it helps keep them in place.
I use hot water because it speeds up the felting process. A spray bottle or bulb sprinkler is perfect for wetting down your felting project. If you don’t have one that’s ok too. Just use your hands to transfer a little bit of water at a time from a bowl.
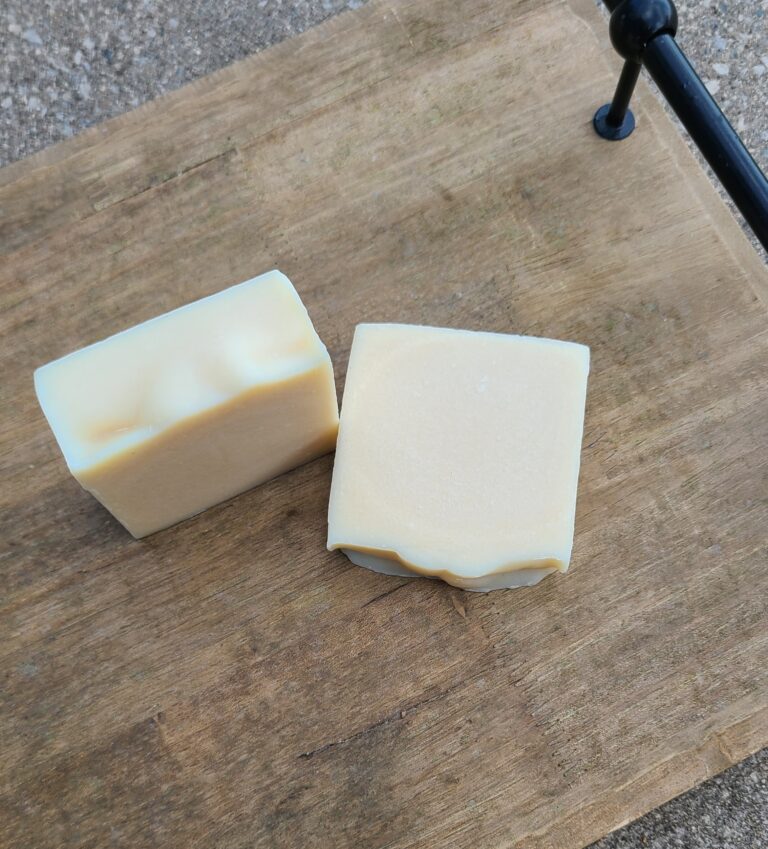
I use my homemade goat milk soap, which is olive oil based, for wet felting, but Dawn dish soap works great too!
A dowel makes it easier to exert more pressure on the project to finish the felting process. It also gives you a nice round shape for rolling.
Wrapping your project in a bath towel gives you a soft surface to work with and will soak up any soapy water that gets squeezed out, a win/win! For adding needle-felted details, use a felting mat under your picture and felting needles to attach additional fiber. Don’t forget guards to protect your fingers from punctures, felting needles are sharp!
Felted Landscape Scene Video Tutorial
In the Part 1 video, follow along as I “paint” with wool and mohair creating a meadow scene with soap, water, and wet-felting techniques.
In Part 2, watch as I add needle-felted fence posts, trees, flowers, and animals to the scene!
Directions to Make a Felted Landscape Scene
- Set out all your supplies on a large, flat workspace. I do my felting at my kitchen table.
- Fold a bath towel in half and put it where you want to do your felting.
- Lay one piece of bubble wrap (bubble side up) on top of the towel.
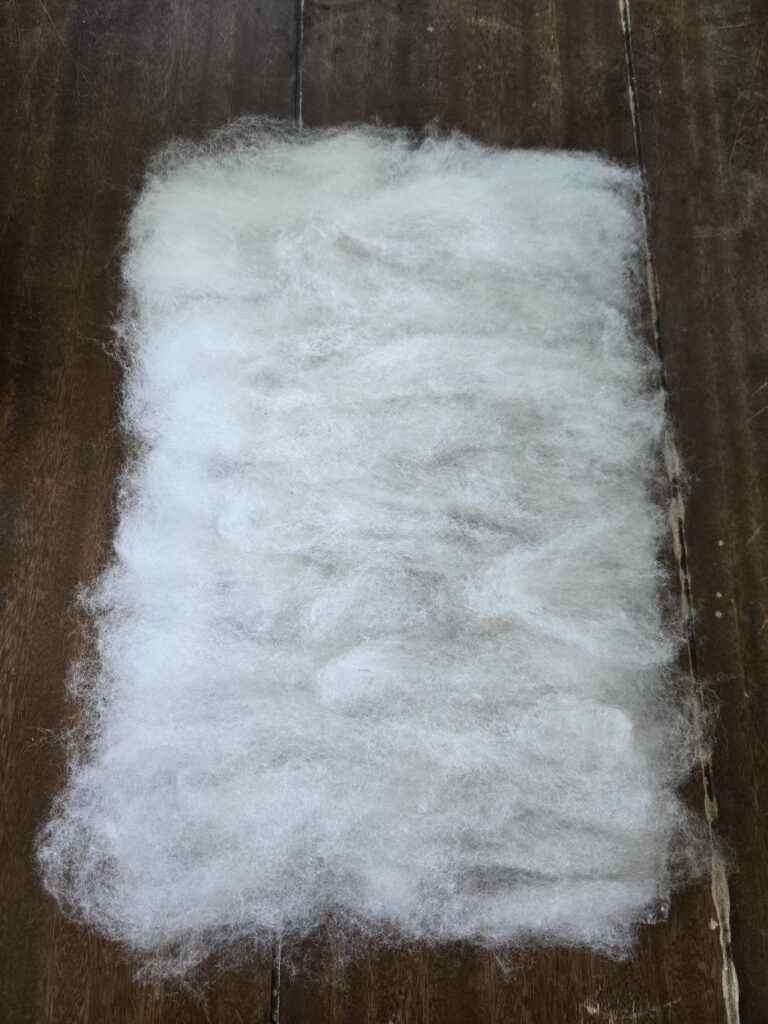
- Begin laying out the backing for your picture (on the bubble wrap) with coarse wool. Pull off thin wisps and layer them halfway over one another in a horizontal direction. Make sure the whole area you want to be the picture is covered evenly.
- Now make a second layer with your coarse wool. This time arrange the wisps up and down, so they are aligned vertically. Make sure the first layer is completely covered and that the layer is even.
- Now the backing is complete. If you want a thicker picture, you can add additional layers.
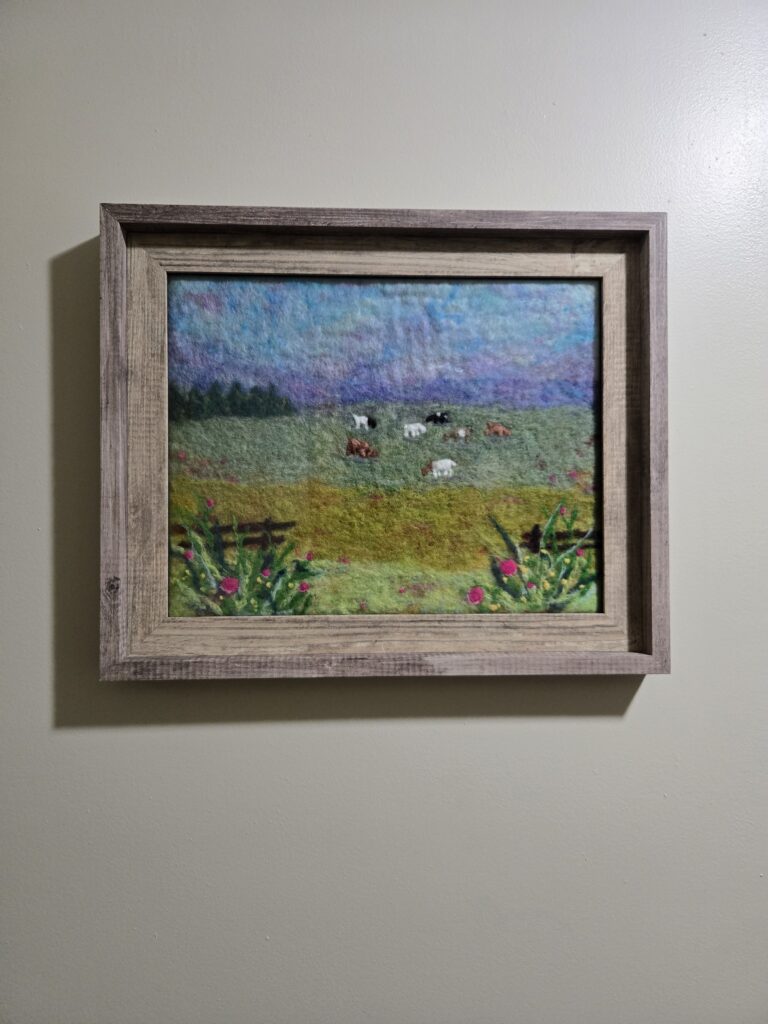
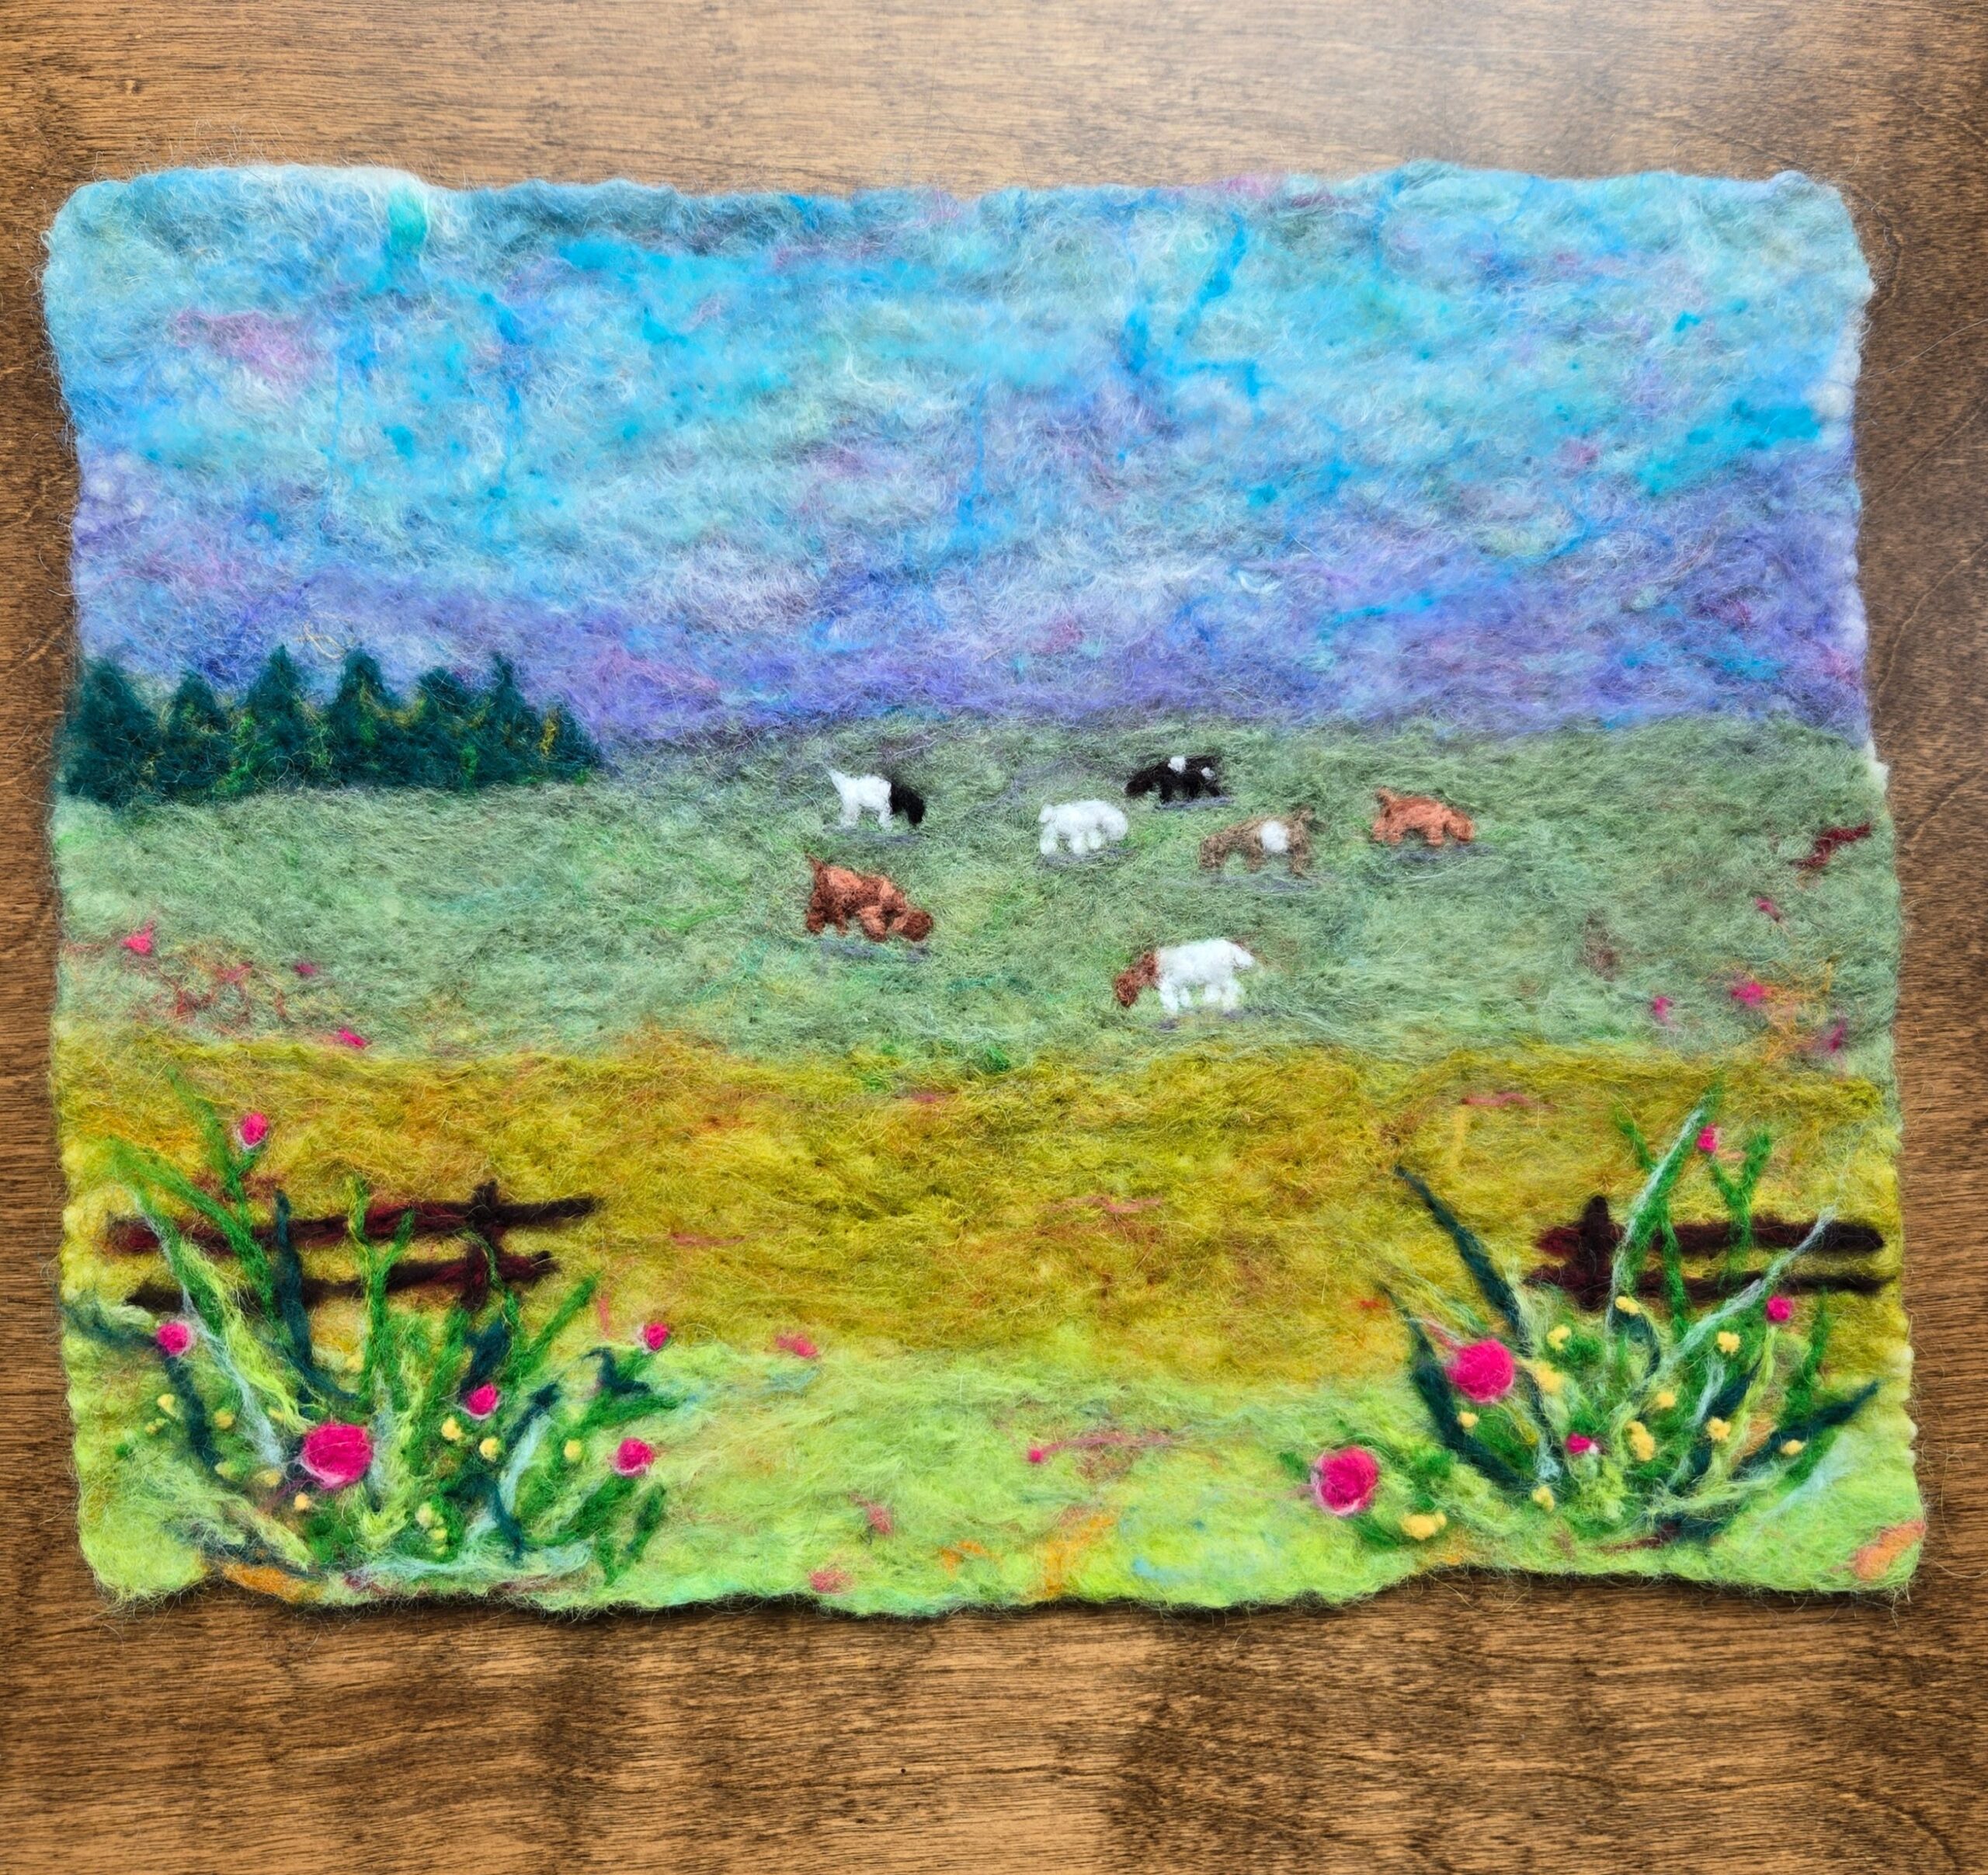
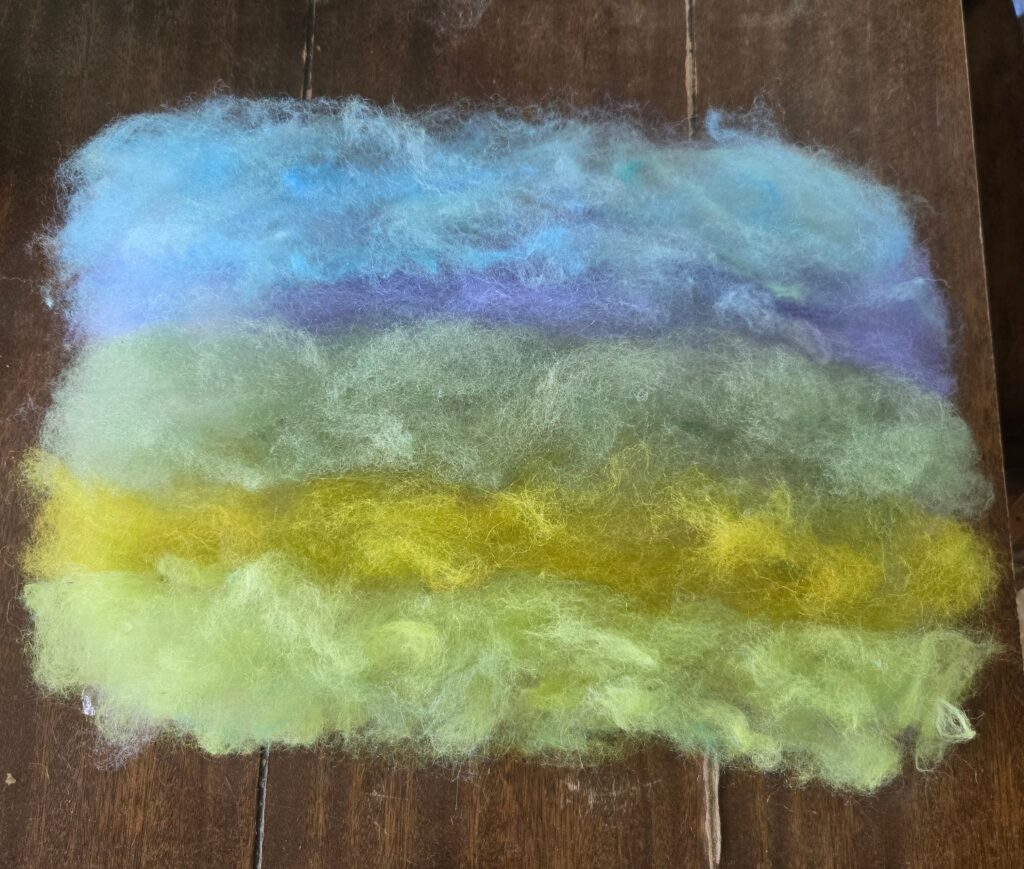
- Its time to make your landscape scene! Think about what type of image you want to create. Finding a picture can be a good starting point. Select the colors that you want and begin laying them in thin wisps in a horizontal direction over the backing wool that you already arranged. I used light blue at the top and purplish-blue underneath to make the sky. I used three different greens to create the illusion of hills for the bottom half of my picture.
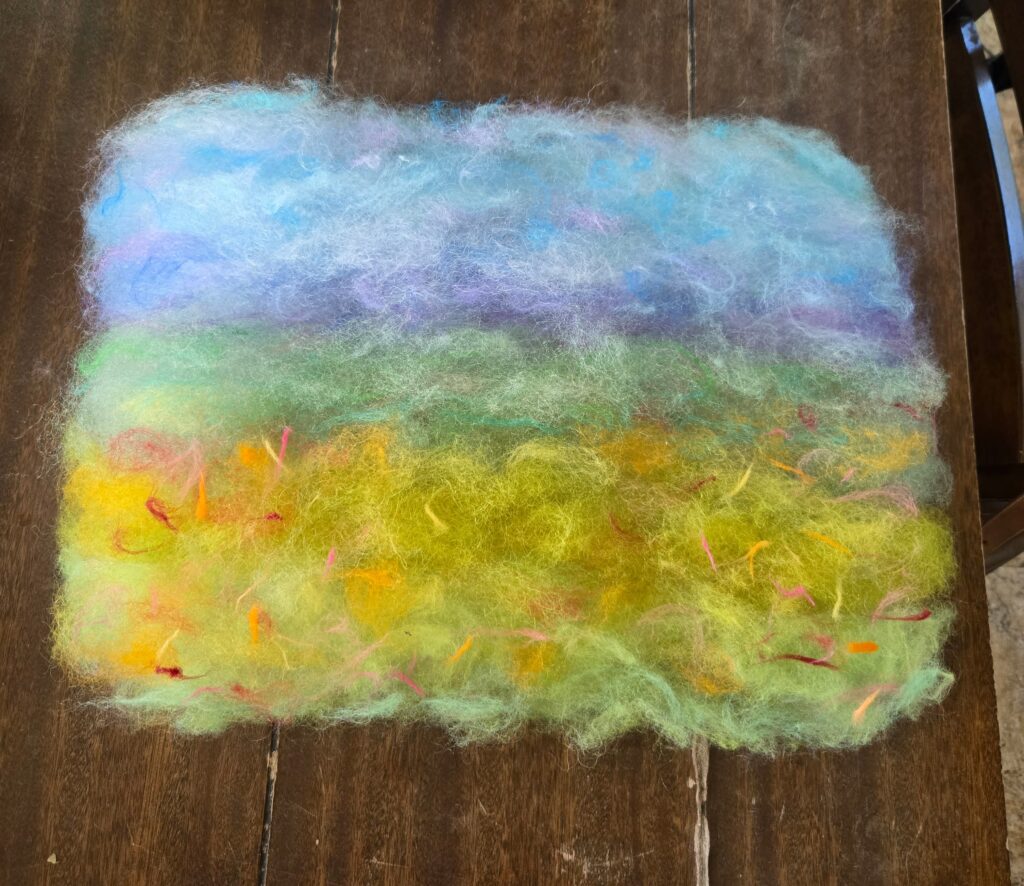
- Once you have the general layout arranged, you can add additional fiber for variety and interest. I added additional shades of blue and purple to my sky and white mohair for clouds. I added yellow, pink, and orange to the grassy hills to look like wildflowers. Keep adding to your picture until you like how it looks.
- Now, it’s time to start wet felting! Thoroughly dampen your picture using a spray bottle or bulb sprinkler and hot water. Make sure all layers are wet.
- Add some soap.
- Cover the picture with felting mesh and begin very gently rubbing the scene through the mesh. It should become sudsy. Use light fingertip pressure as not to disturb the fibers and cause much movement. Continue for at least 5 minutes and make sure all parts of the picture get equal attention.
- Remove the felting mesh and put the second piece of bubble wrap (bubbles down) on top of the picture. Rub on top of the bubble wrap, all over the scene, for at least 5 minutes with slightly more pressure than you used before.
- Remove the bubble wrap and now rub with slightly more pressure with just your hands for an additional 5 minutes.
- Do a pinch test to check your felting progress. If any areas are lifting up, continue rubbing those areas gently before you go on.
- Now flip your picture over so that the backing is facing you, but bubble wrap is still underneath. Fold the wisps hanging off the edges around the backing to make a nice rectangular shape.
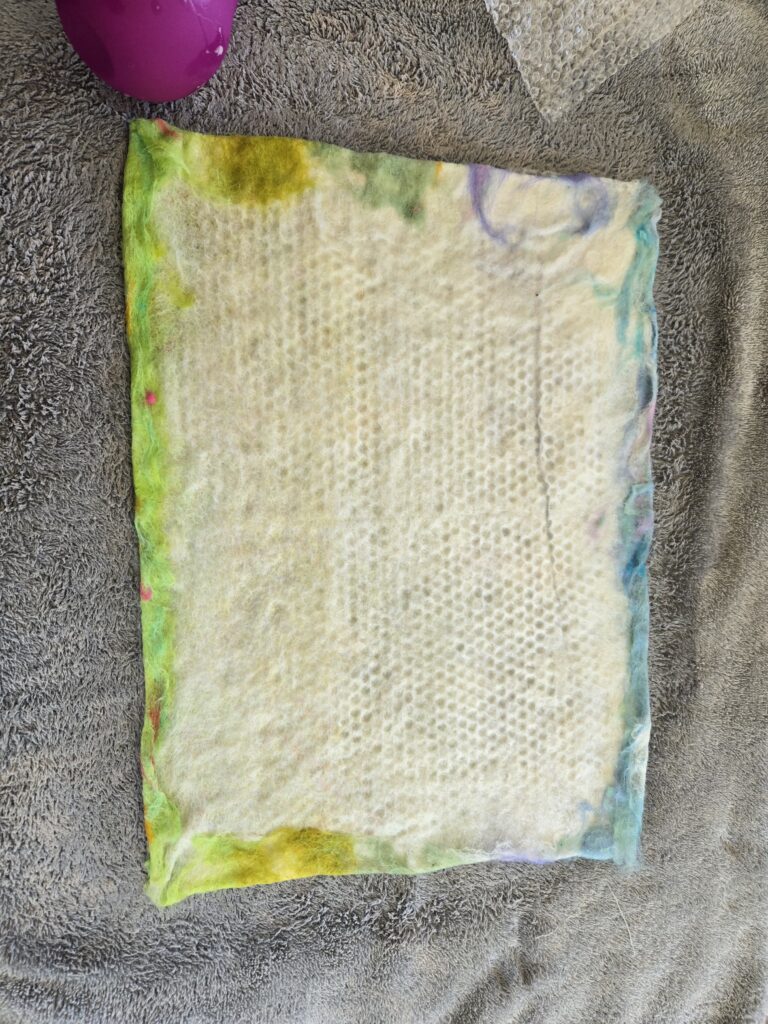
- Now, repeat the process of rubbing this side for 5 minutes with felting mesh, 5 minutes with bubble wrap, and 5 minutes with just your hands.
- If the backing passes the pinch test, you are ready to move on to the rolling phase!
- Put a piece of bubble wrap (bubbles up) under your project with the landscape facing up, put another piece of bubble wrap on top (bubbles down) and get your dowel ready.
- Roll your towel, with the dowel, project, and two pieces of bubble wrap into a long sausage.
- Gently rock the sausage back and forth 100 times (one back and forth movement counts as one time).
- Unroll and give the project a quarter turn, then rock it another 100 times.
- Repeat this process until you have turned the picture back where it started. 400 rolls should be completed.
- Now unroll and flip your project to the backing side. Roll it back up and complete 400 rolls on this side. Turn the project a quarter turn every 100 rolls.
- Now flip it back to the landscape side and do another 400 rolls, but with more pressure this time. Don’t forget to unroll and turn the project a quarter turn every 100 rolls.
- Do the same thing after flipping it over to the backing side.
- Now you should have completed 1,600 rolls. The picture should be well felted and have experienced even shrinkage and kept its general shape and design for the most part.
- To help with final shrinkage and to remove the soap, rinse your landscape scene in plenty of cold water at the sink. You can wad it up and gently wring it out, it won’t hurt it.
- Now, you can do the final shaping of your picture. Gently pull on the corners to make it nice and square.
- Now your wet-felted landscape just needs to air dry for a day or two. I put mine in my bay window while it is drying and flip it over every 12 hours.
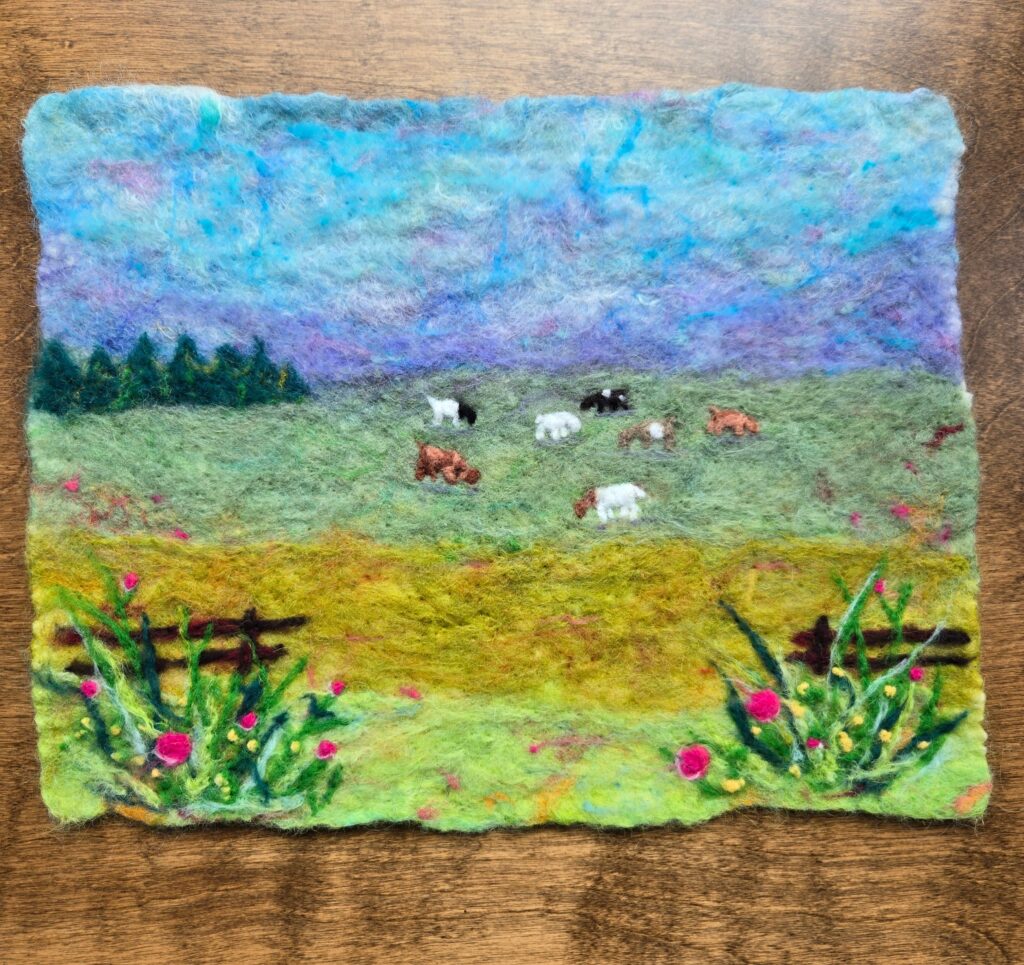
- After it is completely dry, you can add needle-felted details to your scene if you desire. Just put a felting mat underneath the picture and add additional fiber with a felting needle. I prefer a single needle felting tool for making small embellishments. I decided to add some pine trees, goats, fence, and flowering bushes to my landscape.
- Frame and admire your hard work! I used an 11×14 inch wooden picture frame with a spacer so the felt would not touch the glass.