Regular hoof trimming is required to keep your goats healthy and comfortable. This chore is easy enough to accomplish with a little bit of practice. A review of goat hoof anatomy and step-by-step trimming instructions are provided in this informational tutorial.
This post contains affiliate links. As an Amazon Associate, I earn from qualifying purchases.
Regular hoof trimming helps keep your goat’s feet healthy and comfortable. Walking on unbalanced, overgrown hooves can make your goat lame.
Discomfort and mobility problems aren’t the only issues untended hooves cause, overgrown flaps of hoof can harbor bacteria and yeast leading to foot rot.
The good news is that these conditions are preventable and although it may seem intimidating at first, hoof trimming is fairly easy to do.

Overview of Hoof Anatomy
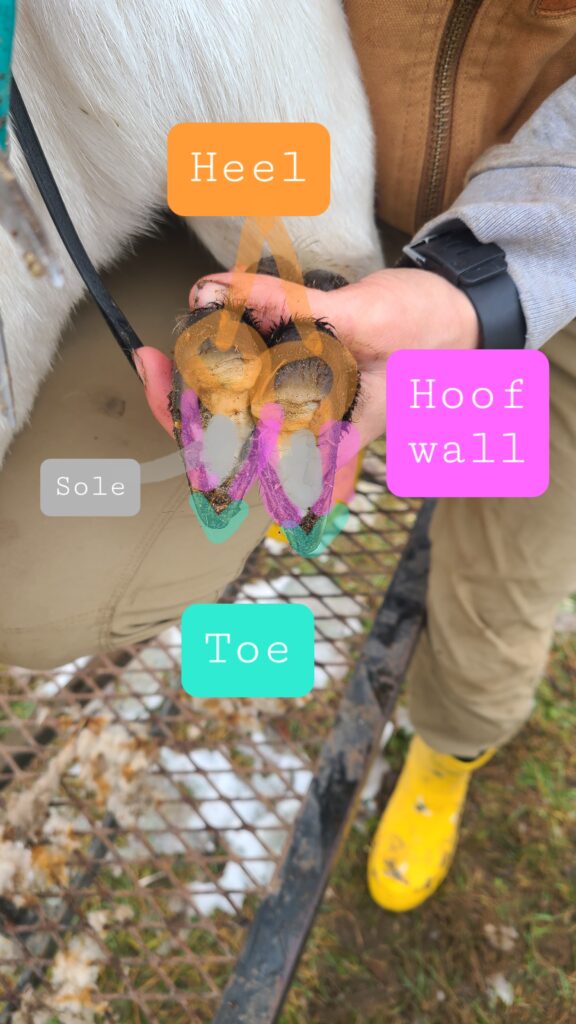
Before I go through the steps of hoof trimming, let’s review some anatomy. Make sure you know where the heel, toe, hoof wall, and sole are located before you start. See the color-coded picture below as a reference.
Tips for Trimming a Goat’s Hooves
Trim every 6-8 weeks on a regular schedule, this makes it quicker (and easier) on you and your goats!
Trim after it has been wet outside (rain, snow, morning dew… you get the picture), this softens the hoof wall and makes trimming easier.
Save your back and use a stanchion! Elevating the goat makes it so you don’t have as far to lean over, plus the stanchion helps keep the goat calm and still.
It may be a good idea to keep a styptic pencil on hand in case you get a bleeder. In a pinch, flour or corn starch can help with clotting instead.
Don’t expect to fix chronic issues with just one good trim. I have acquired goats with really terrible feet that took months of corrective trimming to see real improvement.
Giving your goats something abrasive to climb on can help them wear down their hooves naturally. A rock pile, concrete blocks, or a poured cement pad can all do the trick. This does not take the place of regular trimming, but can help lengthen the interval between trims.
Materials Needed for Trimming a Goat’s Hooves
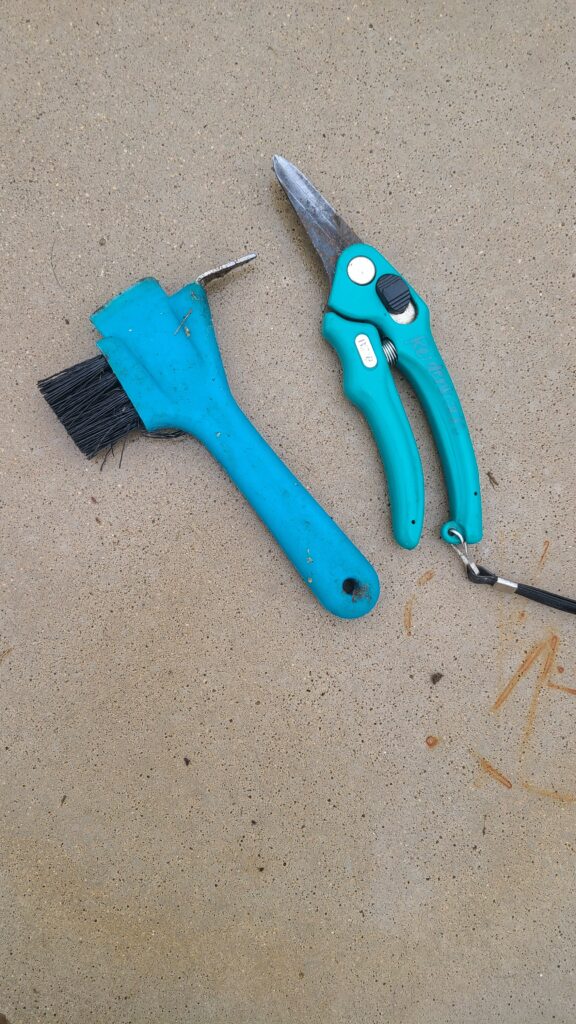
- Hoof trimmers/ pruning shears
- Hoof pick or brush (optional)
- Stanchion (optional)
Directions for Trimming a Goat’s Hooves
- Secure the goat in a stanchion or have a helper hold onto the goat. Alternatively, tie the goat to minimize its movement.
- Position yourself next to the goat, facing the animal’s tail
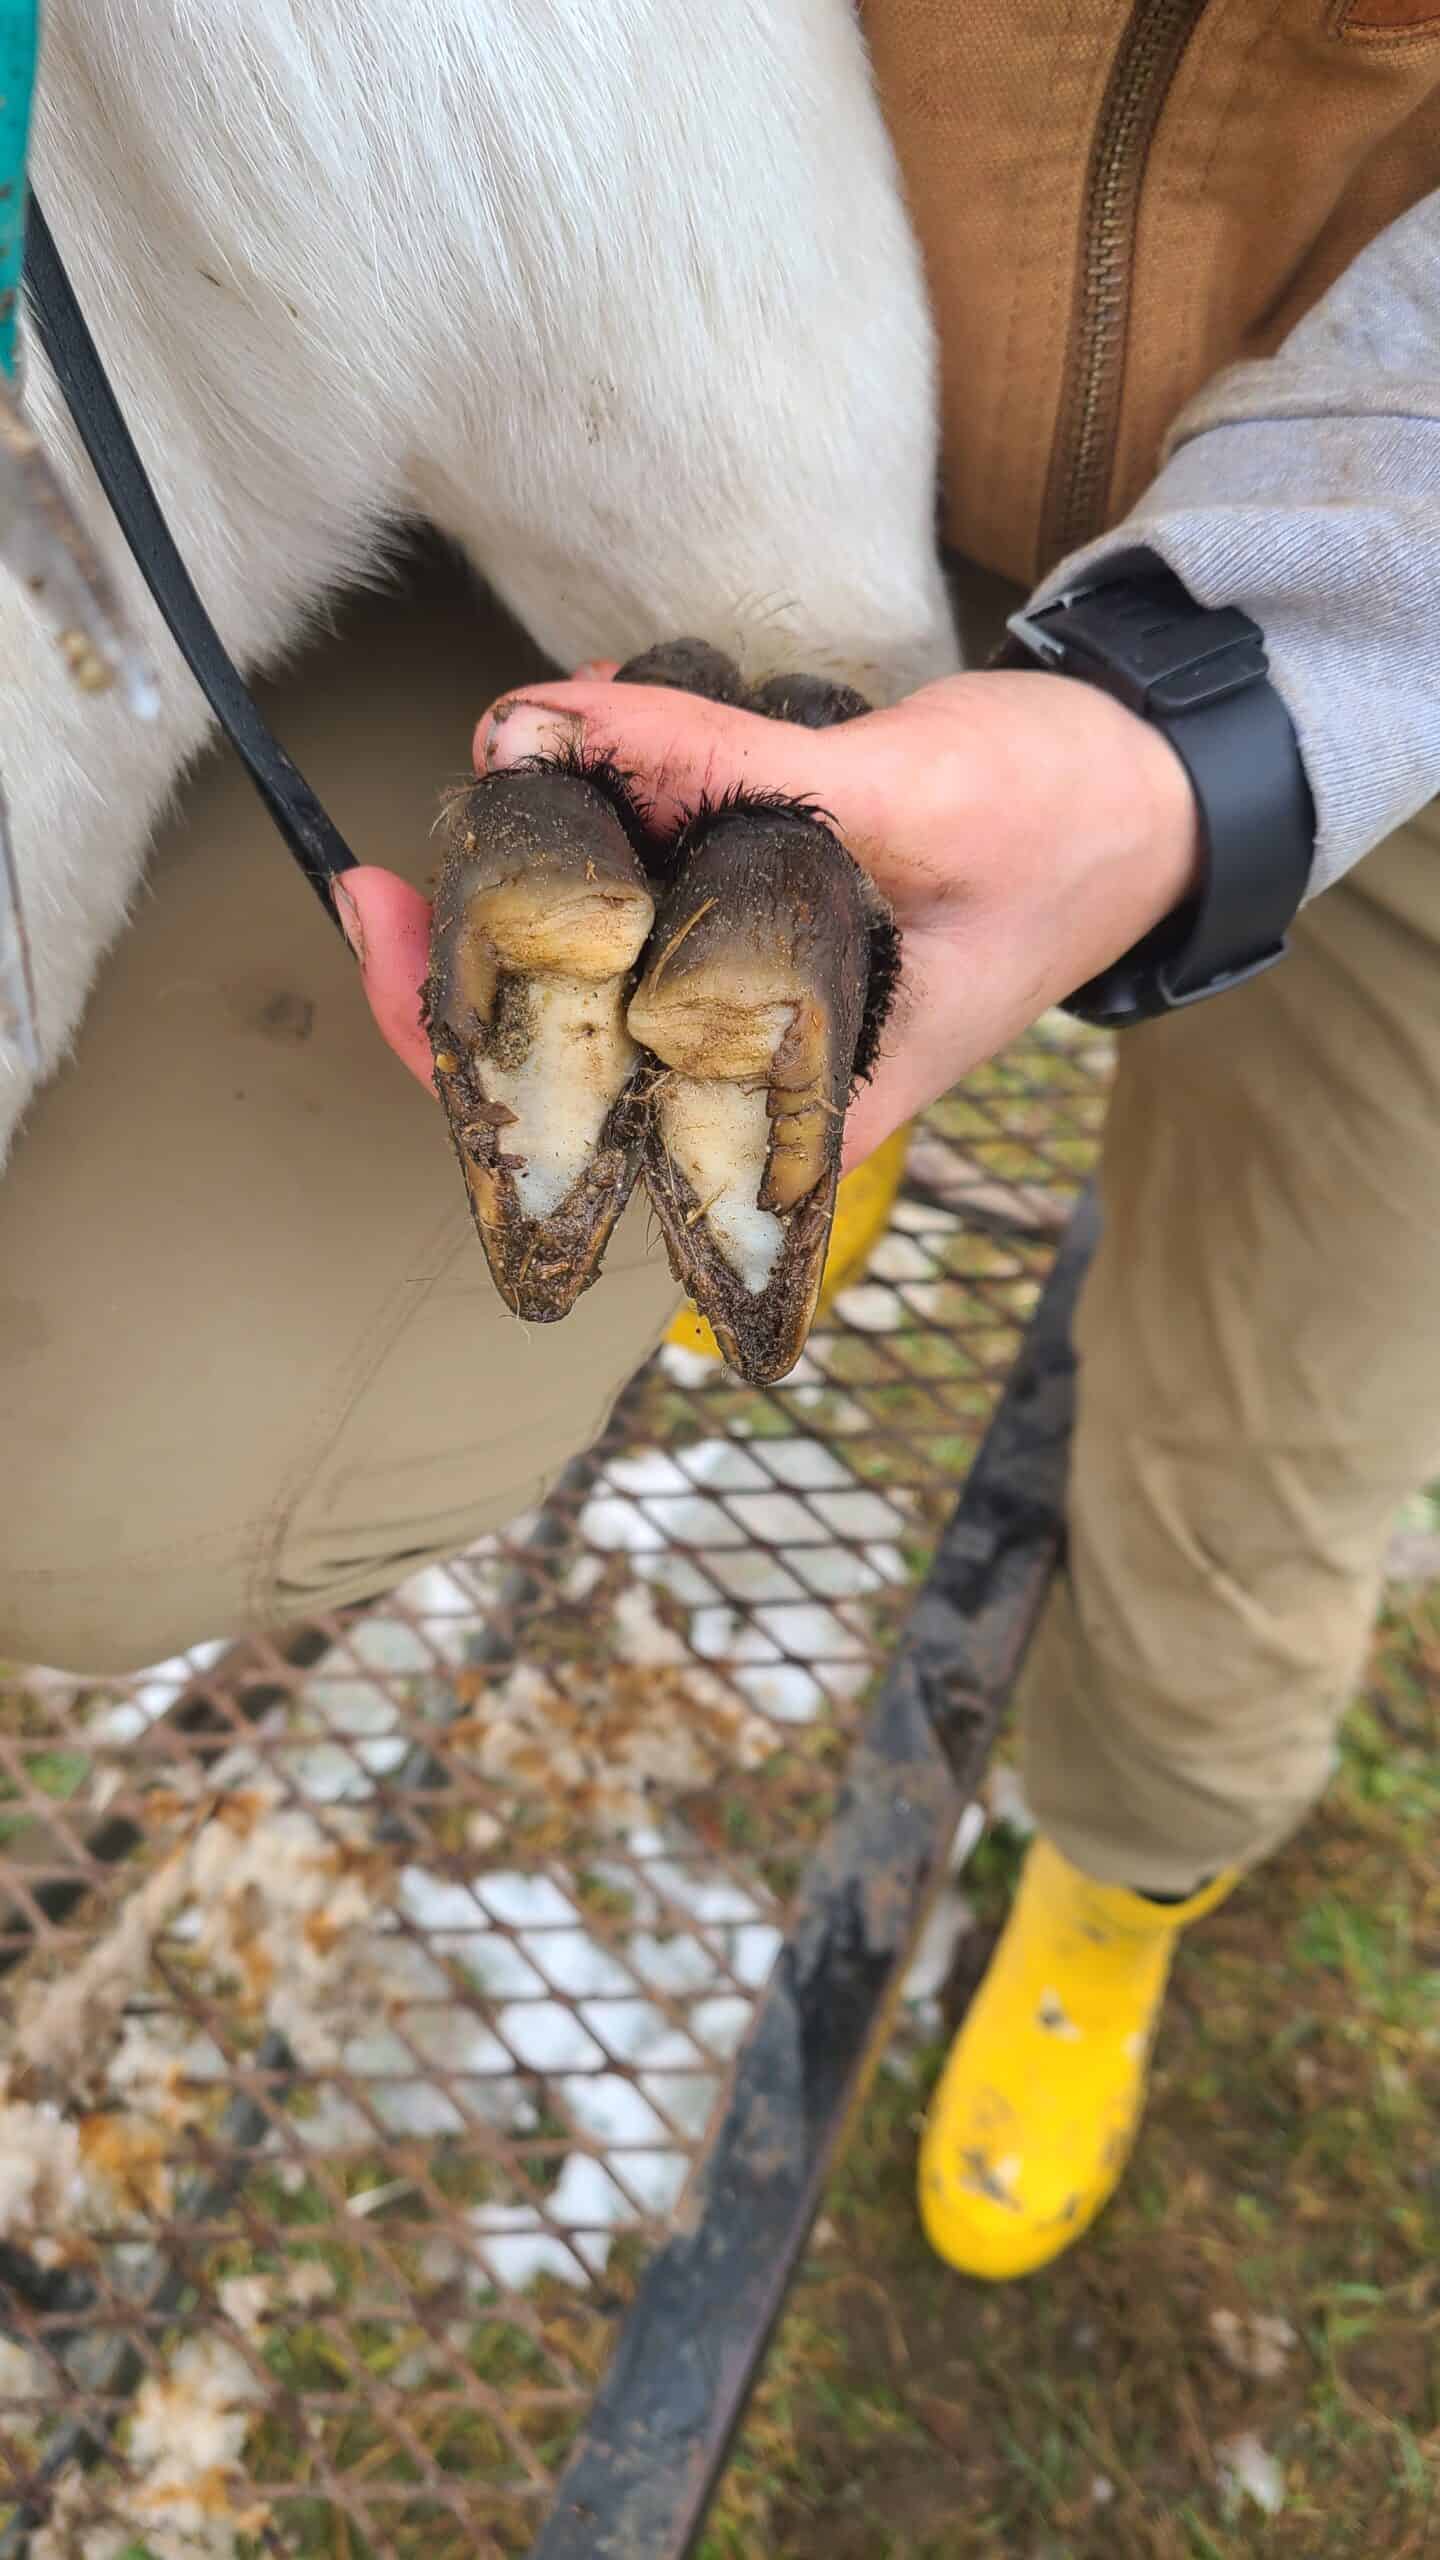
- Pick up one of the goat’s feet and support/stabilize it on your thigh. See photo at the top of this post for reference.
- If needed, use a hoof pick or brush to remove dirt and debris.
- Inspect the hoof to see what parts need trimmed and to look for any signs of disease
- Using hoof trimmers, begin snipping to removing overgrown pieces of the hoof wall. I begin with the point of the trimmers facing the toe. I take my final snips with them turned around so that they face the heels.
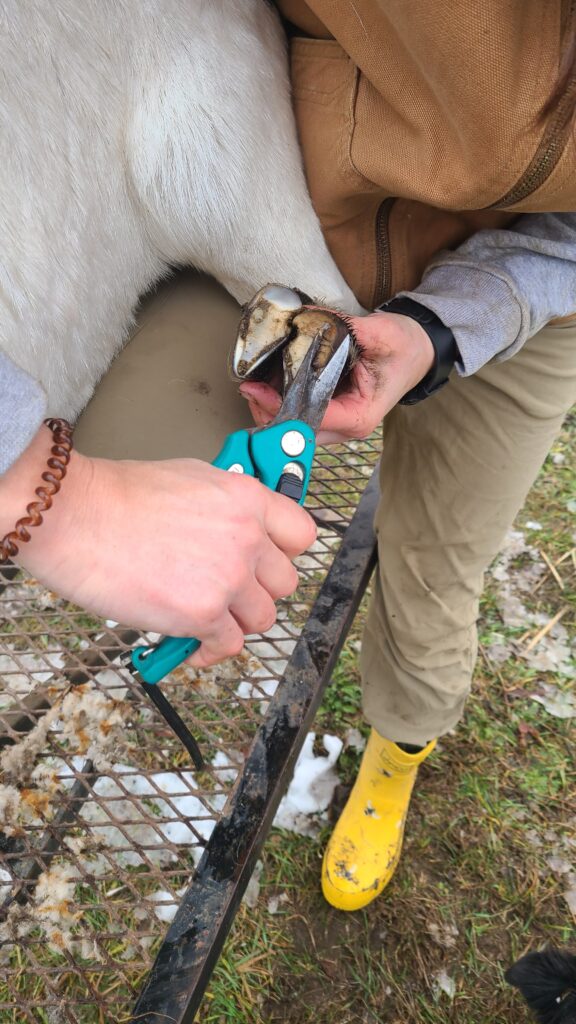
- Remove a little bit at a time and stop when the toe and entire hoof wall are even with the sole. If you go too far, or remove some of the sole, the hoof may bleed. Stopping before you see pink is a good way to prevent going too far and causing bleeding.
- Now, remove material on the heels so that they are even with the newly trimmed hoof walls.
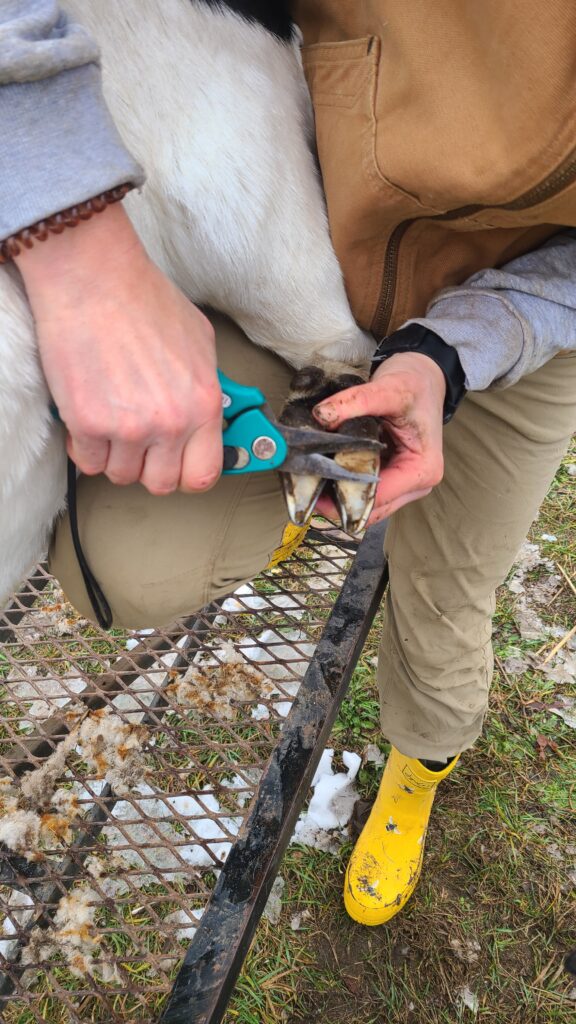
- Set the goat’s hoof down and see if it looks balanced and even when the goat puts weight on it. If it isn’t, continue trimming and then checking.
- Repeat steps #3 through 9 on the goat’s other three feet
- Document the trimming for future reference and any pertinent notes

Mother, farmer, author, and teacher by trade… She loves tending to things and watching them grow!
