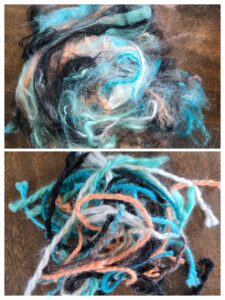
You can turn scraps of natural fiber yarn into something useful and eliminate waste while crafting. Using this tutorial, you can welt-felt beautiful dryer balls from leftover pieces of yarn. These recycled dryer balls help reduce drying time and wrinkles in your laundry.

This post contains affiliate links. As an Amazon Associate, I earn from qualifying purchases.
I am a cinch maker and when I complete a project, I am left with scraps of beautiful mohair yarn. If you spin, crochet, or craft with fiber, you probably find yourself in the same boat!
Throwing away fiber, no matter how small, bothered me, so I decided to come up with a new use for my scraps of yarn. I started wet-felting them into dryer balls and now I have a new, useful product made completely out of recycled materials!
Dryer balls are fun and easy to make, you can make them with any kind of 100% natural fiber yarn. I raise Angora goats and work with mohair, but wool or alpaca are great too.
This tutorial will walk you through the steps to wet felt scrap yarn, but dryer balls can also be created with a needle felting technique. For more information on needle felting dryer balls, click here to read my other article!
Benefits of Natural Fiber Dryer Balls
Dryer balls absorb some of the moisture from your load of wet laundry and reduce drying time. They are pretty heavy and as they roll around in the dryer, they help reduce wrinkles and static in your clothing. Not only that, but they can be infused with essential oils to provide a fresh scent to your clean laundry.
Ditch the chemically-laden fabric softeners and dryer sheets and go the non-toxic route with dryer balls! Natural fiber dryer balls are eco-friendly and sustainable. You can save on energy costs and reduce waste in your home by using dryer balls in your laundry. An added bonus is that when you are done with them, they are compostable and biodegrade.
Materials Needed for Making Wet-Felted Dryer Balls with Yarn Waste
- Natural fiber yarn scraps
- Natural fiber yarn
- Hot water
- Dish soap
- Cold water
- Flexible fabric ruler
- Pantihose
- Acrylic yarn
- Scissors
- Washing machine
- Dryer
- Essential oils (optional)
I make one dryer ball with about 2 ounces of scrap yarn. Depending on how many and how big you want your dryer balls, you may use more or less fiber.
You will use hot and cold water from your sink to felt the dryer balls. Dish soap helps the fiber to felt. I use Dawn!
A flexible fabric ruler can be used to check the size of your dryer balls and help ensure uniformity. I felt my dryer balls until they are between 9 and 10 inches in circumference.
Once you are done wet felting your fiber, you will use a pantihose to run the dryer balls through the washing machine. Acrylic yarn is used to separate the balls from one another during washing. Acrylic yarn wont felt or stick to the balls, so it is easier to use.
Once washed in the washing machine and dried in the dryer, you can cut the pantihose with scissors, admire your work, and start using your dryer balls.
If you want to add scent to your dryer balls, a couple drops of essential oil will do the trick. The dryer balls can be “recharged” with essential oils periodically.
Directions for Making Wet-Felted Dryer Balls with Yarn Waste
- Gather your natural fiber scrap yarn. If the yarn is plied, you will need to unravel it and separate the fibers before felting.

- Make a ball with the unraveled yarn, the fibers should be going every which way to felt properly
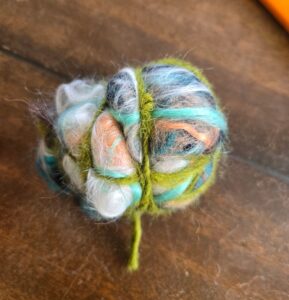
- Wrap the ball tightly with enough natural fiber yarn to keep it together. It’s ok if it is not a perfect ball shape to start.

- Run the wrapped ball under hot water to penetrate the fibers and begin squishing it into a round shape.
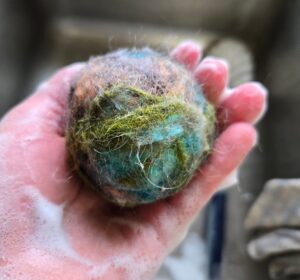
- Add dish soap to the surface of the ball and keep squishing it for at least 15 minutes. Keep your hands over the sink so that you don’t get soap lather all over the place.
- As felting progresses, you will feel the fibers begin to shrink and the ball begin to get firmer.
- Continue squishing the ball until it is solid and has little give when squeezed.

- Run the ball under cold water at the sink. The water will rinse the soap from the dryer ball and the change in temperature will shock it and help cement the felting process.
- Using the flexible fabric ruler, check the circumference of your ball. I aim for felting to a size of about10 inches around, the balls will shrink slightly in the washing and drying step.
- If your ball is smaller than you would like, you can add another layer of unraveled yarn to it. Wrap and repeat the above process.
- Once your balls are the right size, you are ready to complete the felting process by washing your dryer balls in the washing machine. Prepare the balls for washing by placing them into a nylon pantihose.
- Separate the dryer balls in the pantihose but cutting and tying a piece of acrylic yarn in between them.
- Wash your dryer balls (inside the pantihose) in your washing machine. I wash my new dryer balls with a load of towels on the hot water setting. The hot water and agitation of the washing machine cycle will help to completely felt your dryer balls so that they do not come apart.
- Dry your dryer balls (still inside the pantihose) in your clothes dryer with the load of clean laundry. I run my dryer on the hottest setting twice to help finish felting and drying them.
- Remove your dryer balls by cutting the pantihose with scissors and popping them out. They should be dense, round, and fully felted. If for some reason yours are not staying together, another trip through the washer and dryer should help.
- If you want to scent your dryer balls, put a drop of essential oil on the ball surface in a few spots. I use lavender essential oil on mine and they smell heavenly!
- Use your dryer balls in the next load of laundry that you do.
How to Use Felted Dryer Balls
Using your natural fiber felted dryer balls couldn’t be easier! All you need to do is add three or more dryer balls to your clean, wet laundry and run your dryer as usual. Make sure to store your dryer balls in a well-ventilated area when not in use.

Mother, farmer, author, and teacher by trade… She loves tending to things and watching them grow!
