If you have a Black Walnut tree, you should try harvesting some walnuts for baking and snacking. Provided are tips for identifying, removing hulls, and drying walnuts for an easy and successful foraging experience. Involve the whole family and bring some wild food to your table!

This post contains affiliate links. As an Amazon Associate, I earn from qualifying purchases.
Every fall, do you wonder where those ugly green balls in the road or your yard come from?
If you look up (do so carefully, falling walnuts hurt!), you will probably find a black walnut tree.
Black walnut trees are valued for their lumber, but did you know they also produce tasty nuts that can be enjoyed raw, on oatmeal, or in brownies or fudge?
We have quite a few wild black walnut trees on our farm in southwestern Michigan. Harvesting the nuts is a fun activity that we do as a family every year. It doesn’t take too much work or any fancy equipment- give it a try!
Identifying a Black Walnut Tree
When it comes to foraging, it is always better to be safe than sorry. It’s important to be sure of what you are taking from the wild. I have a plant identification book that I use, as well as the PlantNet app on my phone.
Black walnut trees have gray, textured bark and pointed leaves that grow around a common stem. Their fruits (walnuts) feature a fleshy, green hull that surrounds a hard, corrugated shell with a palmated nut inside.
Materials Needed for Harvesting Black Walnuts
- 5 gallon bucket
- Crow bar or hammer
- Gloves
- Water
- Paint mixing attachment for drill
- Power drill
- Slotted crate
- Nutcracker
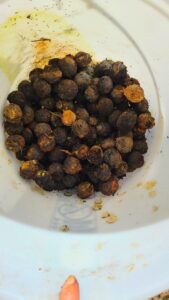
Steps for Harvesting Black Walnuts
- 1. Find a black walnut tree
- 2. Put on gloves
- 3. Collect walnuts
- 4. Remove the hulls- use a hammer, crow bar, or your hands (beware of staining!)

- 5. Put hulled walnuts into a 5 gallon bucket
- 6. Add enough water to cover the walnuts
- 7. Agitate with a drill-powered paint mixer for 2 minutes
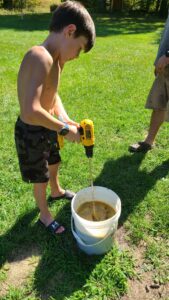
- 8. Dispose of the water (don’t pour on your grass- it will kill it!)
- 9. Repeat steps #6-8 until the nuts are completely clean and no hull remnants remain
- 10. Spread in a single layer in a slotted crate
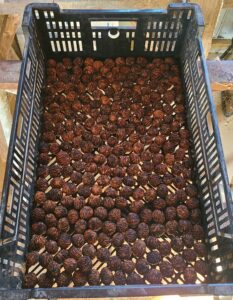
- 11. Every few days, shake the crate to turn the walnuts
- 12. Allow dry time of 1 month to lapse
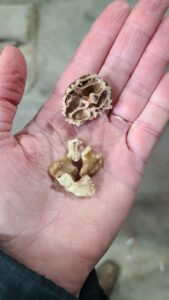
- 13. Crack and eat your walnuts!

Mother, farmer, author, and teacher by trade… She loves tending to things and watching them grow!
