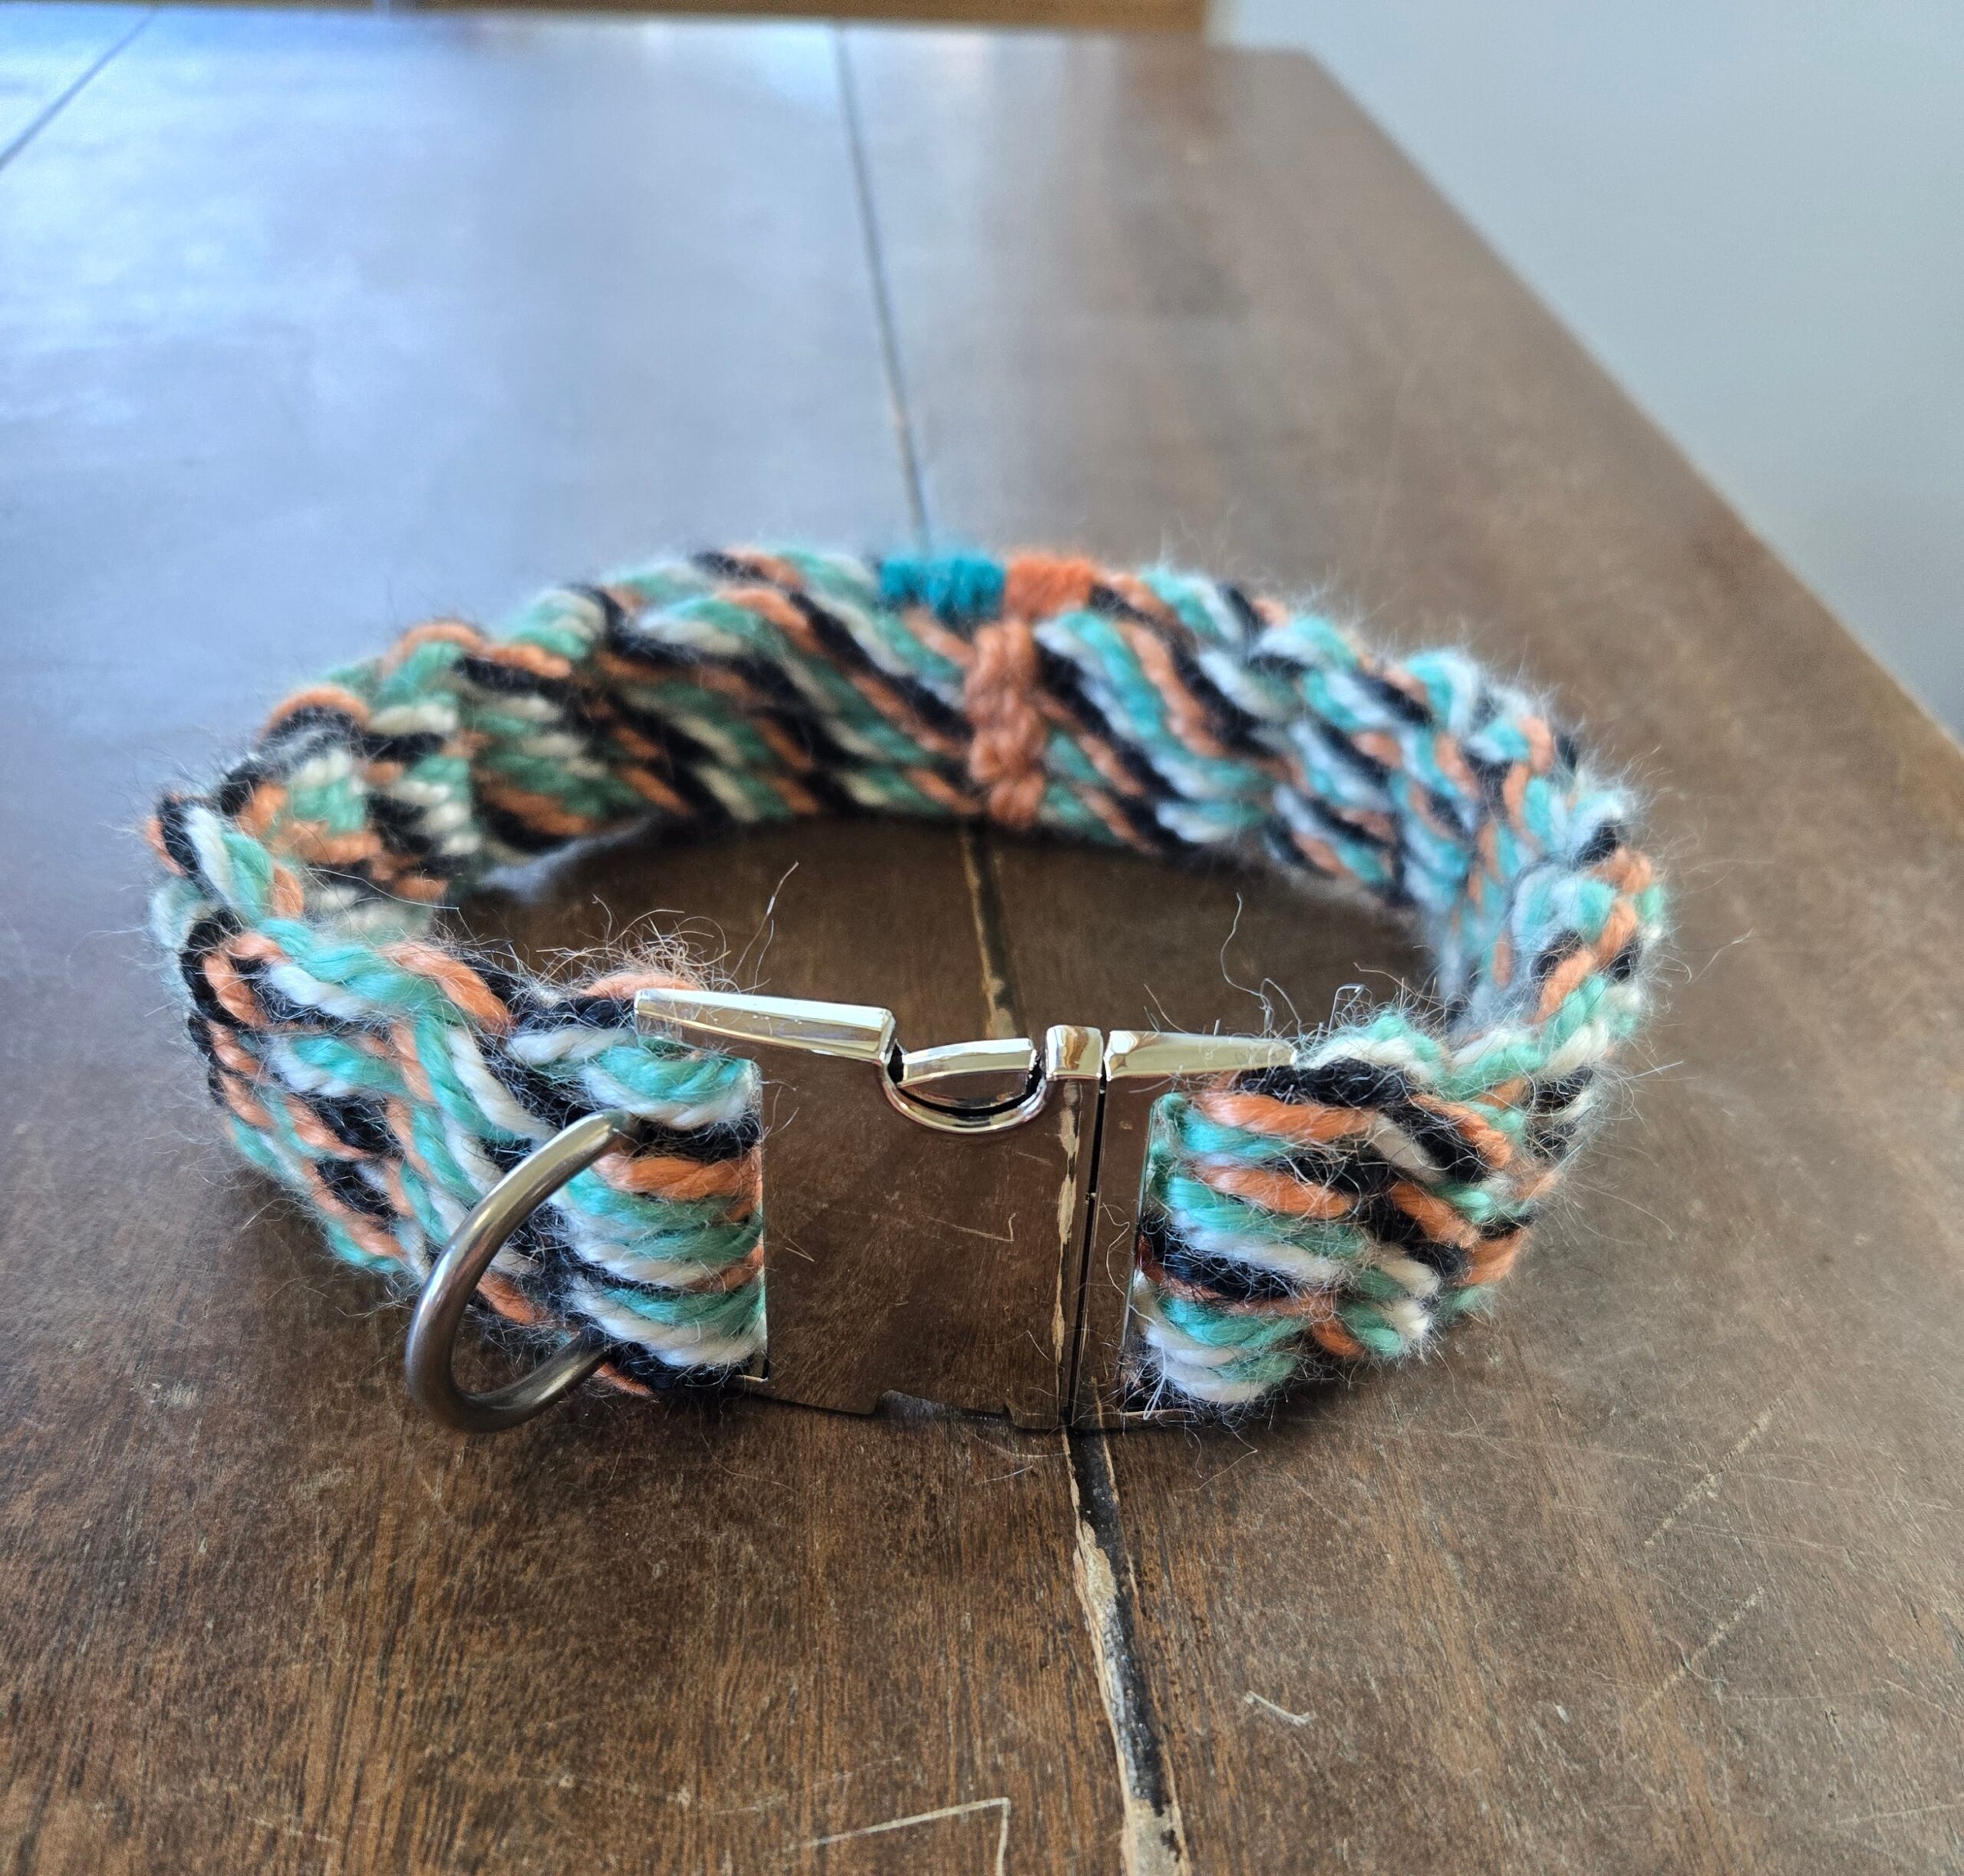
How to Make a Mohair Dog Collar
Mohair is soft, durable, washable, and beautiful. You can make a comfortable, stylish, one-of-a-kind collar for your dog with mohair cord. Directions for weaving a mohair dog collar on a loom and embellishing it are provided in this post.

This post contains affiliate links. As an Amazon Associate, I earn from qualifying purchases.
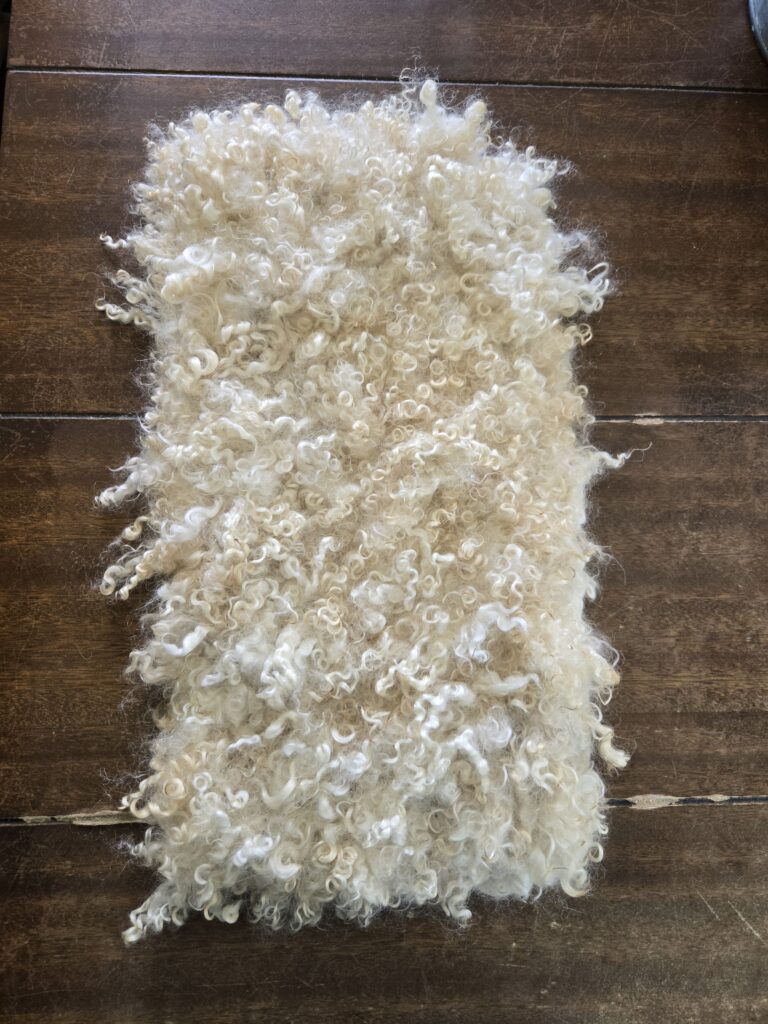
Mohair, the fiber from an Angora goat, is great for making cinches and breast collars, but mohair is not just for horses! The same reasons why mohair makes great tack (strength, softness, durability, colorfastness) also make it an awesome material for dog collars.
You can make a comfortable, stylish, one-of-a-kind collar for your dog with mohair cord. The process involved is similar to weaving mohair for horse tack. To learn more about making a mohair breast collar, follow the link to my other article. For instructions on washing a handmade mohair item, click here.
Here are the directions for weaving an 18-inch dog collar using mohair, a loom, and tapestry needles. For a larger or smaller collar, adjust the amount of mohair accordingly. As a rule, I use one foot of mohair cord per inch of collar that I want to make (i.e. 16 feet to make a 16-inch circumference collar).
Materials Needed for Making a Mohair Dog Collar
- Cinch weaving loom
- Wire
- 18 feet of 8-ply mohair cord
- Scissors
- Masking tape
- Measuring tape
- Tapestry needles
- Hemostats or needle nose pliers
- Cord separator
- Cord beater
- One 1-inch D ring
- One 1.5-inch side release buckle
- 7 feet of 2-ply mohair yarn
You can buy or make a cinch weaving loom. My husband made mine from 1×3 inch hardwood with holes drilled every inch for adjustability to any size project. It has metal hooks for holding most hardware, but since the dog collar buckles are so small compared to cinch buckles, I wired them to the hooks for stability.
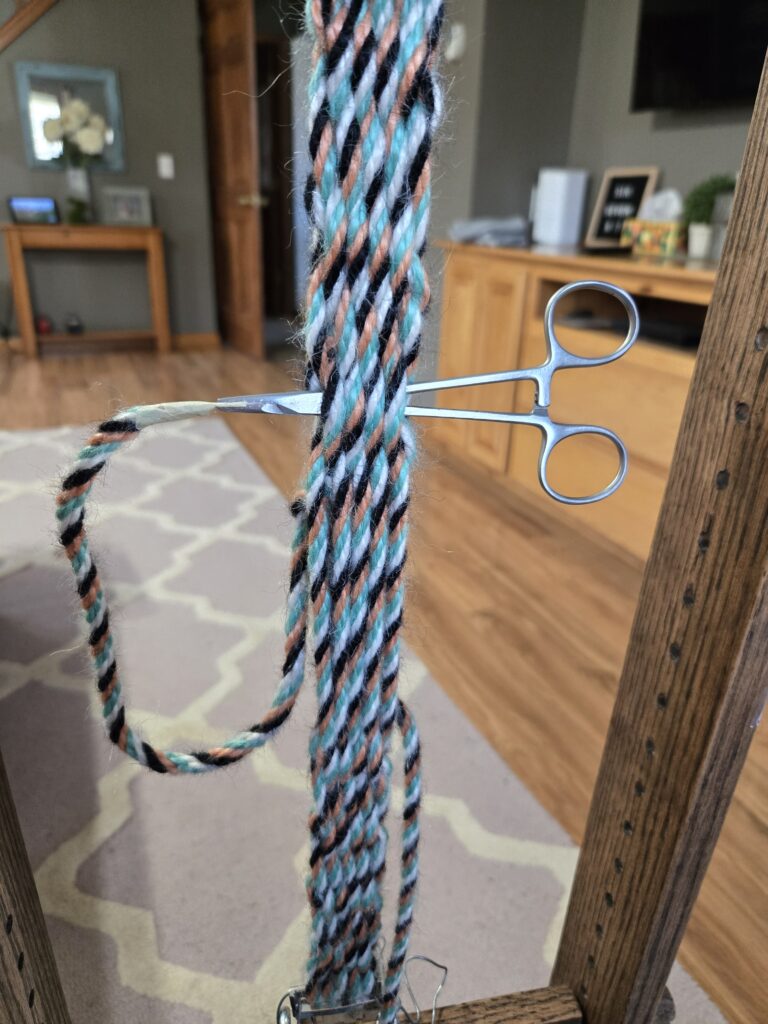
The collar is made by weaving 8-ply mohair (I get mine from Ubraidit.com) between 1.5 inch side release buckles. You will need scissors to cut the mohair, masking tape for the ends of the yarn, and a flexible measuring tape for your project. Tapestry needles and hemostats or needle nose pliers are helpful for burying the ends of the yarn when you are finished weaving.
Since this is a double-woven design, a cord separator helps keep the front and back strands from overlapping. I use a ¼ inch dowel that fits into the holes on my loom as a cord separator. A cord beater helps compact your weaving so that it is nice and tight. I use a piece of sanded wood as a cord beater.
Adding a 1-inch D-ring to the collar will give you a place to clip a leash and attach your dog’s license or other identification tags.
Choosing heavy-duty hardware that wont rust is important because your dog will probably get the collar dirty or wet. Nickel-plated buckles and stainless-steel D-rings are good options!
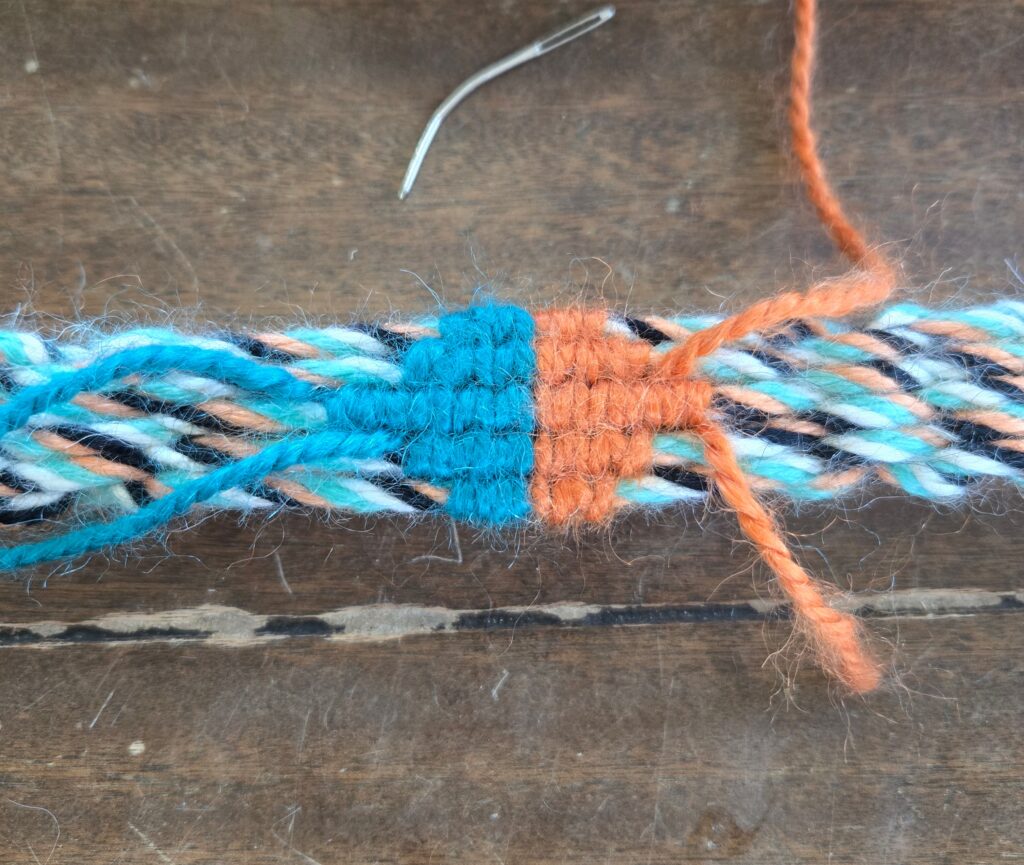
If you want to embellish the middle of your dog collar, you can use any color 2-ply mohair yarn. I used a couple feet of two different colors to make the design you see in the pictures.
Directions for Making a Mohair Dog Collar
- Measure the circumference of your dog’s neck to determine the size of the collar you want to make. These directions will help you create a mohair collar with an 18 inch circumference.
- With a measuring tape and scissors, measure out and cut an 18-foot-long piece of 8-ply mohair cord
- Wrap both ends of the cord with masking tape so that they do not unravel
- Adjust your loom so that the hooks are 20 inches apart, the collar will shrink a few inches when it is removed from the loom and will end up having a circumference of 18 inches.
- Separate your side release buckles and wire one to the upper hooks and one to the lower hooks. Make sure the buckles are oriented so that they will clip together once removed from the loom.
- Thread one end of the 8-ply cord into the space on the buckle at the top, leaving 28 inches of loose cord coming out the back on the lefthand side, secure with a hemostat so that it does not move.
- Thread the long end of the loose cord through the front of the space on the lower buckle, pull so that it is snug.
- Come back up to the upper buckle and thread the long piece from behind.
- Now add the 1-inch D-ring. It will be threaded through the middle three strands of cord on the front of the collar.
- Continue this process of coming in the front of the lower buckle and behind the upper buckle and through the D ring at the top until you have 9 strands. Five of the strands should be in front and 4 in the back, and the 3 middle ones should be through the D-ring.
- You should end up with at least 28 inches of loose cord at the top, on the lefthand side of the upper buckle and at the bottom, on the righthand side of the lower buckle, which you will use for weaving.
- To finish the roper-style woven dog collar, start weaving with the top loose cord. Use your fingers to push the first front strand down and pull the first back strand forward. Push down and pull up every other cord so that now all the back strands are in the front, and the front strands are in the back. Thread the loose cord through this space and pull it snug. It will lay horizontally against all the vertical strands.
- Run your hands up to the cord separator and then come down to the weave you just did. This will bring the front strands back to the front and the back strands back to the back. Weave the loose piece through this space so it is coming out on the side that you started. Use your cord beater to make the weave nice and tight.
- Repeat this process two more times, pushing down and pulling up every other strand and weaving the loose piece through. You should have the cord woven through six times horizontally when you are done.
- Now you are ready to bury the end. I bury the end by running the tip of my hemostats through the weave and pulling the cord through. I do this twice in two different directions so that it is secure. When it is buried twice, you can trim the end with scissors.
- To finish the collar, you will do the same thing with the loose cord at the bottom. There is no D-ring to add on this end.
- Weave the loose cord through, horizontally, six times and bury the end.
- Now the collar is essentially done, but there is a 5-inch space in the center that you can embellish with a design, if you wish. To make each pyramid shape like I did, cut a 30-inch piece of 2-ply mohair yarn and fold it in half and weave it under one vertical strand of 8-ply mohair and over the next. I made the base of each pyramid 5 rows wide and 4 rows high, the second tier 3 rows wide and 2 rows high, and the tip 1 row wide and 4 rows high.
- When you are done weaving the 2-ply mohair, secure the ends by threading them through a tapestry needle, into your design, and trimming the end with scissors. If the weave is tight, use needle nose pliers to give you the leverage you need to pull the needle through.
- Once you are done with your design, you can remove your collar from the loom and try it on your dog!