You might want to send a blood sample in from your goats for pregnancy or disease testing. Drawing blood from your own animals is easier than you might think. Use these directions and tips to complete this routine procedure on your own herd.

This post contains affiliate links. As an Amazon Associate, I earn from qualifying purchases.
You don’t need a veterinary degree to pull blood on your goats. With a review of anatomy, a helping hand, and some practice, this annual task can be pretty quick and easy!
A blood sample is often required for herd biosecurity testing for diseases such as CAE, CL, Johnes, and Q-Fever. A blood sample can also be used to see if your exposed doe is pregnant 30 days post breeding.
Where to Draw Blood on a Goat
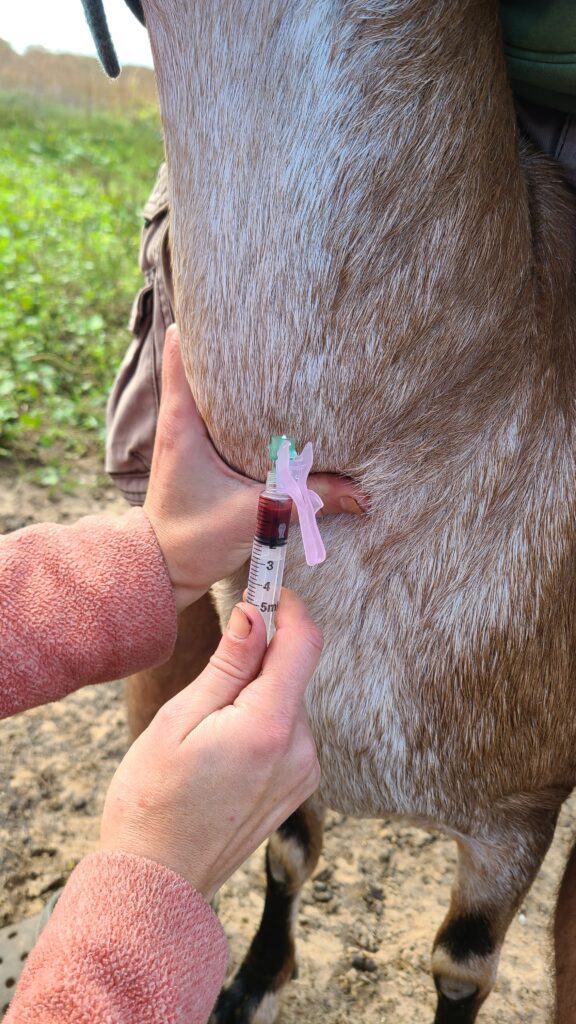
I recommend drawing blood from the external jugular vein on either side of the goat’s neck. It is easy to access if you have another person assisting with the blood draw and easy to feel once pressure is applied (it pops out).
In the picture below, find the highlighted location of the external jugular vein.

Materials Needed for Drawing Blood on a Goat
- 21-gauge needle
- 5 ml syringe
- Blood collection vial
- Permanent marker
- Clippers (optional)
- Exam gloves (optional)
- Cotton balls (optional)
- Rubbing alcohol (optional)
I recommend using 21-gauge needles, 18-gauge are a little large for my liking, but they will work as well. A 3 ml syringe is sufficient, but the smaller syringe puts more pressure on the vein and can cause it to collapse. This is why I use a 5 ml syringe (you don’t have to completely fill it with blood).
Use a new needle and syringe for each animal!
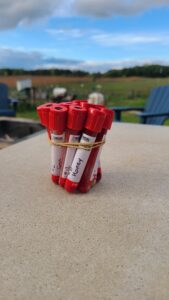
I use 3 ml red-top, plain, vacutainer tubes. Mark each with the name of the goat using a permanent marker.

If you want to be able to see the vein better and clean the site, you can use clippers to remove hair in the area. Before drawing, don exam gloves and wipe the site with a cotton ball soaked in rubbing alcohol.
Procedure for Drawing Blood on a Goat
- 1. One person needs to restrain the goat while the other draws blood. Having the goat between the restrainer’s legs, holding on to their face (or horns) works well. The goal is to keep the animal still and their head up
- 2. Assemble the syringe by putting the needle on (keep it capped for now, for safety)
- 3. Clip the hair and clean the site if you feel necessary
- 4. Apply pressure where the neck meets the shoulder on one side, with your non-dominant hand
- 5. Palpate the vein, it should be a bulge that runs in a line, up towards the jaw. It will feel bouncy
- 6. Uncap the needle
- 7. Insert the needle at a 30-45degree angle (bevel up)
- 8. Pull back slightly on the plunger to aspirate (blood will come into the syringe if you are in the vein)
- 9. If no blood is noted, advance or pull the needle back until you start to get blood. Don’t be afraid to pull the needle out and start over instead of “digging” around
- 10. Fill the syringe to the 3 ml mark
- 11. Simultaneously remove the needle from the vein and your hand from applying pressure to the neck
- 12. Have the person restraining the goat put pressure on the site of the blood draw for 30-60 seconds to make sure the goat isn’t going to bleed anymore
- 13. Fill the vacutainer with 3ml of blood (don’t overfill or force!)
- 14. Discard the used needle in a sharp’s container. Don’t have one? Follow these easy directions to make your own out of a laundry soap container!
- 15. Send your samples to the lab following their specific directions for storage and packing

Mother, farmer, author, and teacher by trade… She loves tending to things and watching them grow!
