If you are a hunter or raise livestock to feed your family, you will find it extremely helpful to have the knowledge and equipment to butcher animals on your own property. This article will highlight the must-have items you need to begin at-home butchering. From dispatching to vacuum-sealing, here are the necessities.

This post contains affiliate links. As an Amazon Associate, I earn from qualifying purchases.
Our family is one of avid hunters and our favorite game to chase is whitetail deer. We have always butchered our own. As our farm grew, we began to embrace home butchering and have done everything from chickens and rabbits to full grown steers. It’s something we take pride in for many reasons. The advantages of home butchering are seemingly endless and provide benefits for you and your family as well as the animal you wish to harvest and put on the table. See our post about raising your own meat here.
A run down of what you would need to harvest an animal on your own farm can be found below. Although it may seem daunting at first, you may be surprised at how little you need to get started.
1. Gambrel
A gambrel is the ideal piece of equipment to hang your animal. It threads through the back legs and hangs the carcass upside down to let blood and water run out of the carcass, as well as allowing air circulation. This is a must for taking on any four legged animal you wish to butcher. They are cheap and can be purchased at any hardware or outdoor store. Or if you have any welding ability, you can absolutely make your own.
2. Space to hang the carcass (its not as much as you think)
All meat benefits from aging. Rigor mortis must run its course and enzymes in the muscle must be allowed adequate time to work their “magic.” It’s what gives you a tender cut of meat that is more palatable once it hits the table. For chickens and rabbits, a day in an ice bath is sufficient. For a steer, 14-21 days in a cooler is ideal.
So, keep this in mind before you take on any project. For most animals, with exception to a steer, 2-3 days should suffice and given the correct outdoor temperature, the corner of your garage of barn would do the trick nicely. If it is hung in these places, I recommend keeping the skin on to protect the meat from airborne dust/dirt. If you are lucky enough to have access to a walk-in cooler, I would take the skin off.
3. Cutting board or countertop
Space is also needed once the animal finishes the aging process. A cutting table is the ideal piece of equipment and can be purchased, but a regular cutting board and countertop work just fine. A large hindquarter can be cut into smaller, more manageable pieces to bring into the kitchen for final breakdown if space to manage large cuts is an issue.
4. Boning knife
When talking about cutlery, there is a reason the boning knife is mentioned first. I grew up butchering deer and only had 1 knife for the whole project- a boning knife. It is the most versatile knife in your repertoire. If you don’t have a skinning knife, use the boning knife. If you don’t have a breaking knife, use the boning knife. You get the picture and you can always expand your knife collection as you continue to hone your skills.
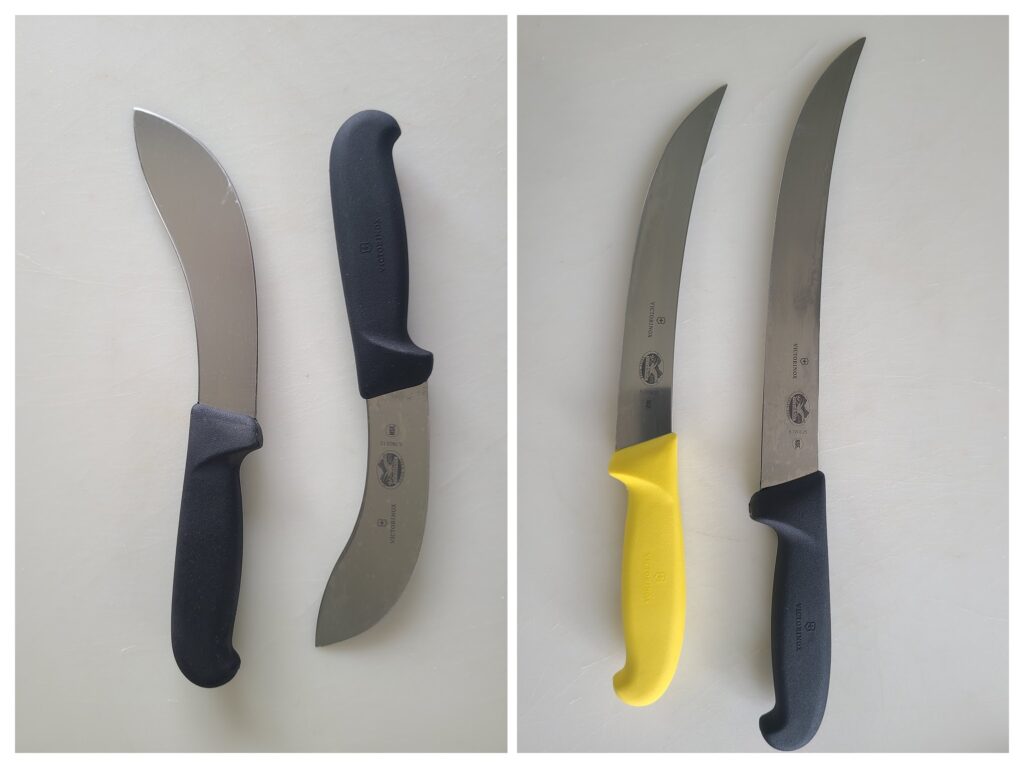
Boning knives come in stiff, semi-stiff, and flex blades with the former being the most rigid, and the latter being the most flexible (think filet knife). I prefer the semi-stiff and actually don’t own either of the other two. For these knives, and all knives listed after, I recommend Victorinox knives for their construction, durability, and ability to hold an edge.
5. Bone saw
There are many cuts of meat you can get off of a carcass. Some are bone-in while others are boneless. You must have a way to cut bone if you wish to have bone-in cuts. Most home butchers can not realistically make arrangements for a meat band saw. They are expensive, although you can get a good deal on used ones if you look hard enough. The same cuts done on a band saw can be achieved with a handsaw. This is what I use and with good success. I own a 16 inch (for smaller animals) and a 24 inch bone saw for larger ones.
6. Specialty knives

As mentioned above, there are many other knives that would be nice to have when tackling a carcass.
The first I would recommend is a breaking knife. This is a longer knife that is used for slicing larger cuts of meat into steaks. The longer knife makes it possible to not have to “saw” through the meat, but instead make one long cut to ensure the edges are nice and clean.
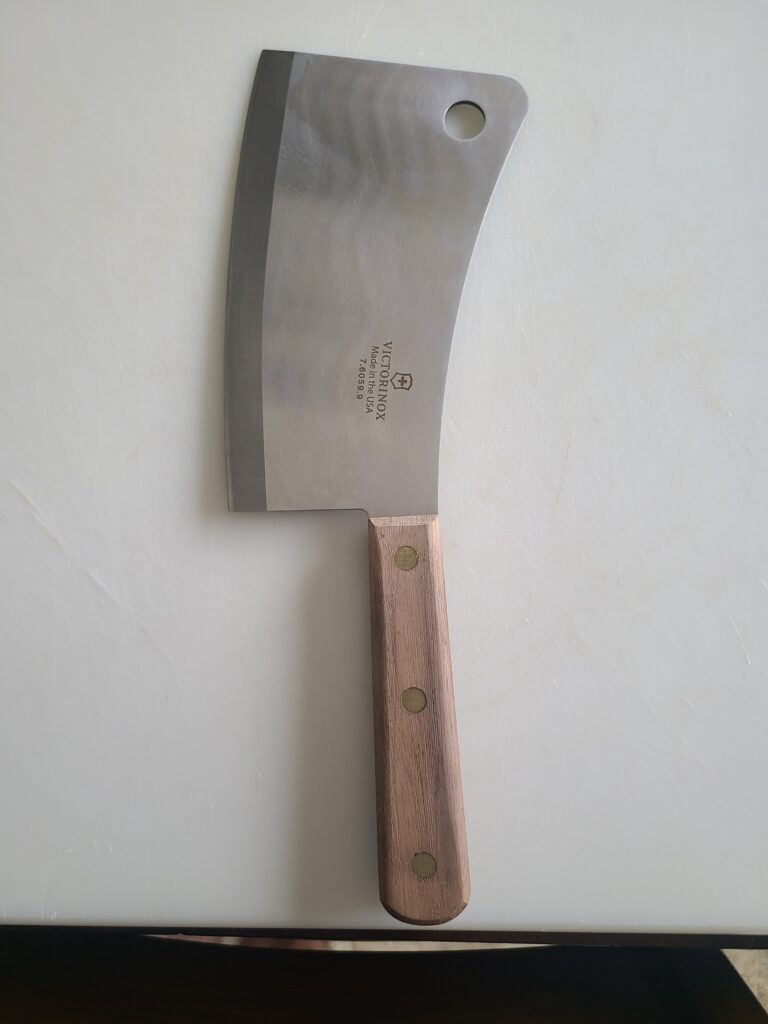
A cleaver is also nice to have on hand. This comes in handy with delicate bones where a saw would be considered overkill. See a picture of the cleaver I have a the beginning of this post.
Skinning knives are also very nice to have given their special design. Sure you can use your boning knife, or any knife for that matter to skin your animal. However, the shape and edge of the skinning knife allows long strokes and effortless skinning. It’s hard to explain until you get one in your hand and try it.
Sharp knives are important and keeping them that way does require a small amount of upkeep. A honing rod is a must and comes with most knife sets. You likely already have one. They come in ceramic, diamond, and steel and all will get the job done. A few quick strokes if you notice your knife dulling will put the edge right back on and you are ready to go. I recommend the diamond rod.
7. Grinder
This can be a stand alone piece of equipment or an attachment on your existing KitchenAid mixer. The former will do a better job, comes with attachments, and is fairly economical if you plan to do any volume of butchering. A good grinder will also work faster and much more efficiently.
8. Vacuum sealer
Storage of your cuts is the final step and freezing them is necessary to keep them for any length of time. Freezer paper is perhaps the cheapest and easiest. However in terms of longevity, it does not hold a candle to a vacuum sealer.
Using freezer paper, no matter how hard you try, does not allow removal of air from the packaging. Therefore this opens the door for freezer burn and oxidation of your meat.
Vacuum sealers are not hard to find. You can get one a the grocery store, or upgrade to a commercial grade vacuum sealer for not all the much more money. This is what I recommend, you can store meat for over a year if you go this route.
Additional Info
And there you have it, a complete list of some must haves as well as some nice to haves if you would like to take on home butchering.
For an additional resource, and one I still use today, I recommend Adam Danforth’s butchering books to help walk you through the process for any animal. It has detailed instructions complete with pictures along the way that will have you trained up in no time. Good luck and have fun!

Butcher, coach, and handyman— there is nothing this man can’t do or fix. He loves the outdoors, playing with his kids, as well as hunting and cooking homegrown or wild meats!
