
In their first few weeks of life, it is imperative that chicks have a warm, safe area to call home. Learn how to set up a brooder and what to include to keep your hatchlings clean, dry, fed, watered, comfortable, and healthy.
This post contains affiliate links. As an Amazon Associate, I earn from qualifying purchases.
Fuzzy, chirping, freshly-hatched chicks are adorable!
They are also fragile and sensitive to temperature fluctuations, get them into a brooder as soon as possible to start them off on the right foot. Here’s how!
What is a Brooder?
A brooder is a chicken nursery!
It is the first home that a chick should have in the world outside of its egg. It should contain all of the necessary items to maintain life for the baby bird including food, water, bedding, and a heat source. It should also provide protection from the elements and any predators.
Ideas for Making a Brooder
If you have just a few chicks, a Rubbermaid tote or an empty livestock water tank works great. These are both easy to clean, and reusable.
If you have a larger number or plan to raise chicks every year, constructing a bigger, more permanent space might be the way to go. We have a brooder box built in to the front of our chicken coop that doubles as a feed storage area (you can see it in the picture above). For more information on our chicken coop design, click here to read my related article!
On our farm, for groups of 50 or more meat chicks, we use our 12-foot by 12-foot horse stalls as a brooder space until they are ready to go out to the chicken tractors.
Curious about chicken tractors? Get the low-down on why we use (and love) them here.
When to Set Up the Brooder
The time to set up a brooder is before you go pick up your chicks from the post office or farm store. You want to have everything ready and the space warm, so they can adjust easily.
Bedding for the Brooder
Inside the brooder you will need bedding so that the chicks stay clean, dry, and warm. Straw or shavings work well.
We use and recommend the deep litter method on our farm, adding bedding to the brooder as needed instead of cleaning it out every few days. We have found that moving them, in order to clean properly, is stressful for the chicks and that adding bedding is easier on both us and them.
Heat Source for the Brooder
It is necessary to provide chicks with a heat source until they have most of their feathers and can maintain their own body temperature. You can provide your chicks with warmth by using a heat lamp, panel, plate, or pad.
The temperature in the brooder will need to be adjusted based on the age of the chicks. For the first week of life, the temperature should be maintained at 95 degrees Fahrenheit. After that, the temperature can be reduced by 5 degrees a week, until an ambient temperature of 75 degrees is reached.
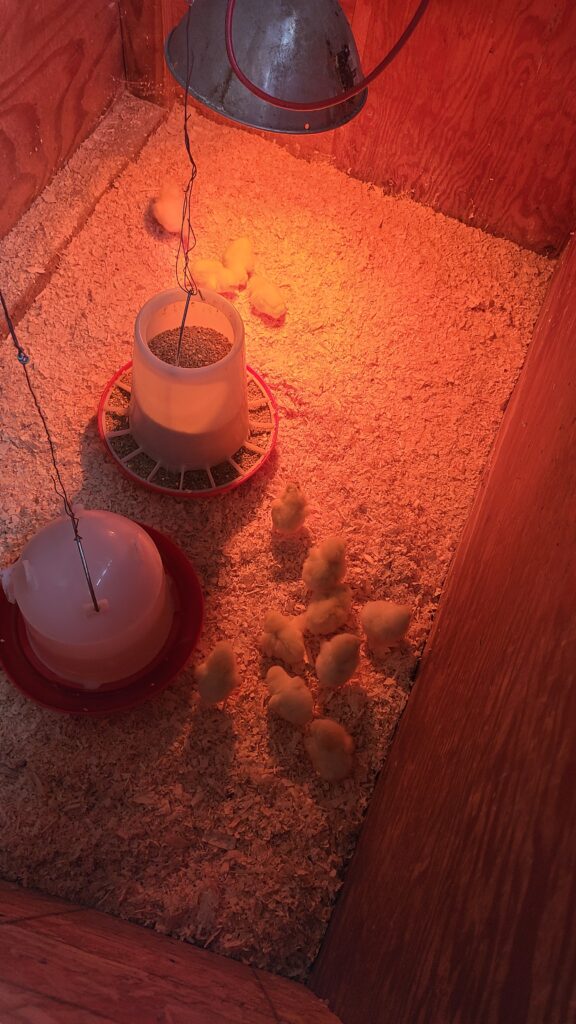
On our farm, we use heat lamps and adjust their height to achieve the desired brooder temperature. Heat lamps need to be secure and checked often because they are a fire risk. Red infrared bulbs are a great option because they are less disruptive to the chicks natural feeding and sleeping patterns than white light.
How to Tell if the Brooder Temperature is Correct
A thermometer can tell you if you are at the target temperature for the chicks at that stage of life. Another way to determine if the brooder temperature is correct is to observe your flock.
If the chicks are cold, they will be grouped together and the smallest ones may get trampled. This is a sign that you need to increase the heat.
In contrast, if the chicks are staying at the periphery of the enclosure, away from the heat source, they are probably too warm.
When the temperature is just right, they will be evenly dispersed and actively eating and drinking or resting.
Water Source for the Brooder
Chicks need to have 24-hour access to fresh water. We prefer gravity-fed waterers made for chickens over water bowls. You do not want to have a waterer that is easily spilled or one that is so deep that a chick could drown in it.
You can dip the beak of your new arrivals in the water so they know where it is. Make sure to replace the water daily, or sooner, if it becomes contaminated with feces.
Food Source for the Brooder
Chicks need to have a diet that is high in protein to sustain their growth. On our farm we use a non-GMO, custom-milled starter/grower feed that has a protein level of 21%. I recommend a feed that is at least 18% protein for the first 8 weeks of life.
We like the gravity-fed type of chicken feeders because they hold a lot of feed and they keep it clean because the chicks can’t stand in them. They also provide room for plenty of chicks to eat at the same time.
Chicks in a brooder can have access to feed around the clock for the first week. After that, some breeds like the Cornish-Cross require a feeding schedule where the animals have 12 hours of feed access followed by pulling the feed for 12 hours (usually overnight). This is to prevent complications that come from overeating and the rapid growth of meat birds. Bantams and laying chicks do fine with full feed access.
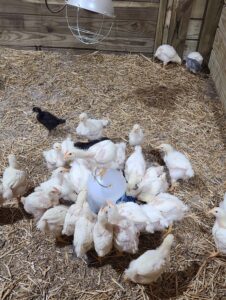
When to Move Chicks Out of the Brooder
Once the chicks have grown large enough to maintain their body temperature even when the weather fluctuates, they can move out of the nursery and into their permanent home such as a chicken coop with a run or a chicken tractor. For our chickens, this is usually when they are around 3 weeks old.
So, that is all there is to brooder set up and use. Good luck with your chicks and have fun watching them grow!

Mother, farmer, author, and teacher by trade… She loves tending to things and watching them grow!